Stock Adjustments
For one-off changes to inventory, it is recommended that you use the Stock Adjustment routines. It is NOT recommended to use this option to do any type of inventory count, as the audit trail is not as verbose.
ADJUSTING INVENTORY VIA THE MENU
In the Inventory > File Maintenance > Product Master Maintenance options, the on-hand, committed and on-order quantities are audited fields and may not be changed. In order to alter the quantities outside of Invoicing, Purchasing or Physical Count functions, stock adjustments must be entered and updated.
Getting Started
- Log in to COUNTERPOINT with your regular “menu-based” login
- Navigate to Inventory > 1. Data Maintenance > 2. Inventory Adjustments > 1. Stock Adjustments
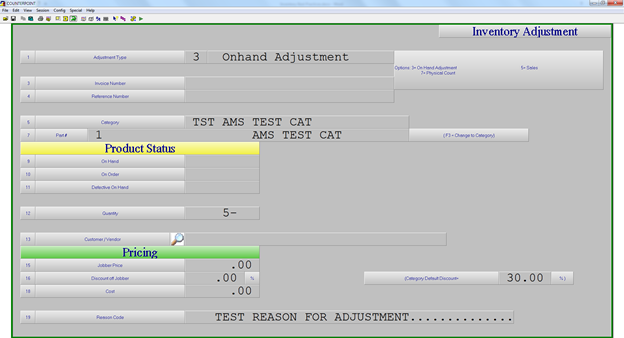
Adjusting Inventory
- Inventory Adjustments require a [PIN] when starting the program. While entering the [PIN] nothing will be displayed on the screen and you must press [ENTER] to complete the entry. If you do not have a PIN type [QUIT] to exit the function. PINs are assigned in sales desk controL > file maintenancE > counterman maintenance.
-
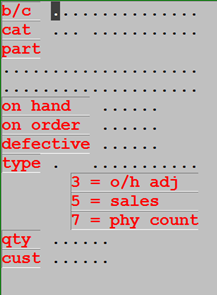
TYPE - Check the function of each type and choose the most appropriate one.
-
[3] allows you to add or reduce (using a -) the quantity of inventory from the existing quantity on file in Inventory ControL > File MaintenancE > Product Master Maintenance. The quantity will be increased or decreased by the quantity you enter in the [quantity] field.
- NOTE: This is the recommended and most common option used here.
- [5] allows you to decrease the quantity on hand for the part number while at the same time increasing the sales history.
-
[7] allows you to completely replace the current quantity on hand with whatever is entered.
- NOTE: This option should NOT be used to count entire categories or groups of numbers. Use the Physical count routines described above for these tasks.
-
INVOICE / REFERENCE
- These fields are skipped during processing within inventory control, but are used during purchasing à purchase order receipts processing à rush receiving, which utilizes the same screen layout.
-
CATEGORY / PART
- Enter the category and part number combination to be affected by this stock adjustment. If the category is not known, the field may be bypassed and the part number entered directly into the part field. When a match to the part number is located, the category will be automatically filled in and the user will be moved to the quantity field. Should the item in question exist in more than one category, the user will be presented with a list to select from.
-
ON HAND / ON ORDER / DEFECTIVE ON HAND
- When a match is found in the Product Master file, the information for these quantities will be displayed.
-
QUANTITY
- Enter the quantity either as a positive or as a negative (using the -) keeping the above rules in mind for each type of adjustment.
-
CUSTOMER NUMBER
- If recording a sale adjustment using type [5], enter in the associated customer number for the history records. If the adjustment type is either [3] or [7], the default vendor will be displayed from the product record.
- JOBBER PRICE / DISC. OFF JOBBER / COST
- This information is displayed for information’s sake, but may not be changed.
-
[3] allows you to add or reduce (using a -) the quantity of inventory from the existing quantity on file in Inventory ControL > File MaintenancE > Product Master Maintenance. The quantity will be increased or decreased by the quantity you enter in the [quantity] field.
- When the transaction is complete, the user will be asked whether or not to Print adjustment journal [y] will print the journal [n] will bypass the printed journal and [p] prints for this packing slip only (normally used for rush receiving)
- Adjustments to inventory levels through stock adjustments update to the General Ledger with the end of day Those entries are printed on the report called General Ledger Summary Edit list that is automatically printed at that time.
ADJUSTING INVENTORY ON THE RF GUN
Getting Started
- Log in to the RF gun.
- Select Option 5 for Stk Adjustment.
- The RF count routine requires a PIN before starting the program. This is the same as used for physical adjustments, etc. If you cannot remember your code please call AMS support.
Adjusting Inventory
- Scan the item in question and fill in the fields as necessary
-
TYPE - Check the function of each type and choose the most appropriate one.
-
[3] allows you to add or reduce (using a -) the quantity of inventory from the existing quantity on file in Inventory ControL > File MaintenancE > Product Master Maintenance. The quantity will be increased or decreased by the quantity you enter in the [quantity] field.
- NOTE: This is the recommended and most common option used here.
- [5] allows you to decrease the quantity on hand for the part number while at the same time increasing the sales history.
-
[7] allows you to completely replace the current quantity on hand with whatever is entered.
- NOTE: This option should NOT be used to count entire categories or groups of numbers. Use the Physical count routines described above for these tasks.
-
[3] allows you to add or reduce (using a -) the quantity of inventory from the existing quantity on file in Inventory ControL > File MaintenancE > Product Master Maintenance. The quantity will be increased or decreased by the quantity you enter in the [quantity] field.
-
QUANTITY
- Enter the quantity either as a positive or as a negative (using the -) keeping the above rules in mind for each type of adjustment.
- CUSTOMER NUMBER
If recording a sale adjustment using type [5], enter in the associated customer number for the history records. If the adjustment type is either [3] or [7], the default vendor will be displayed from the product record.