Fleet Part Tracking
Fleet Tracking Setup
The Billing invoice screen has a built in Customer Fleet Part Tracking module. This module allows the counter staff to in affect build customer, unit, specific electronic catalogues. The creation of these catalogues can have a dramatic affect on the accuracy and speed with which counter staff can service parts requests on a customers fleet vehicles. The fleet part tracking is available from the LINE TYPE field on any invoice line while building an invoice by hitting Shift/[F10]. Doing so will launch the following screen.
If this is the first time you have launched fleet part tracking on the system you will need to take the (M)aintain records option. Which will change the prompts at the bottom of the screen to read as follows.
“(E/P/G) Equipment, Parts , or Groups”
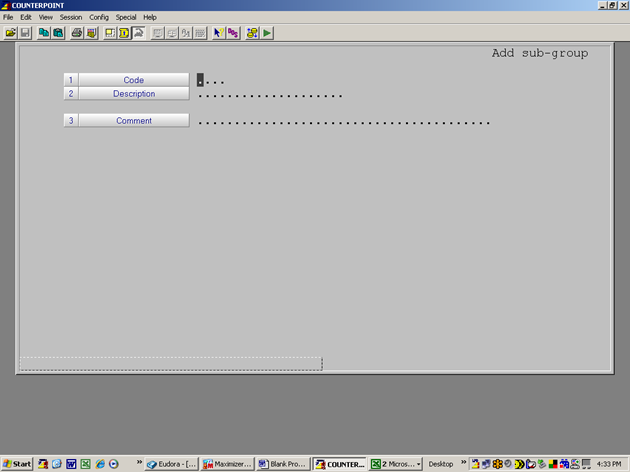
If this is the initial launch of Fleet Part Tracking take the (G)roups option, which will bring up the Add Change Delete Screen. Select ADD which brings up the following screen.
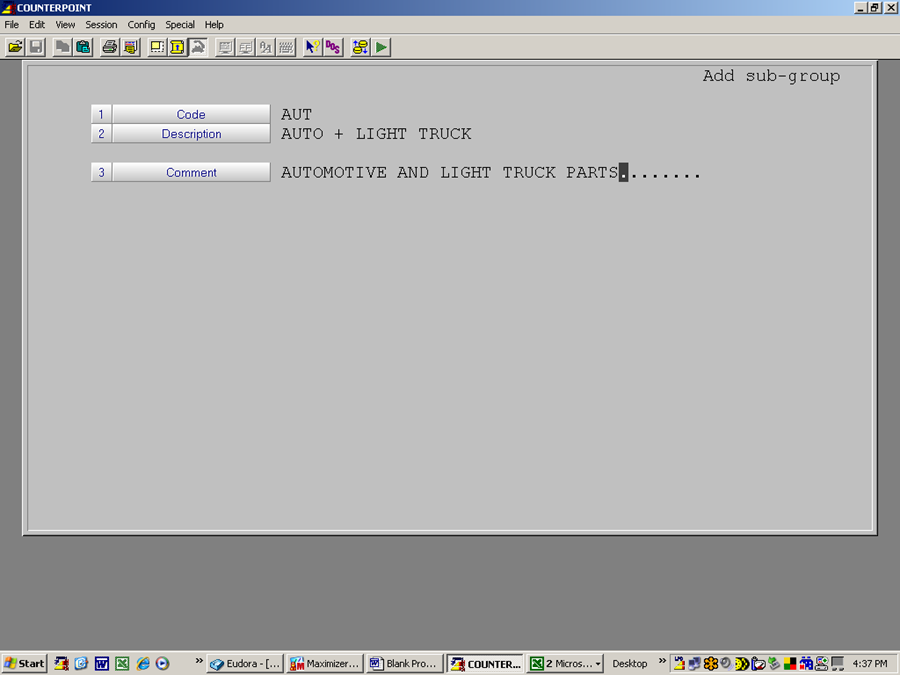
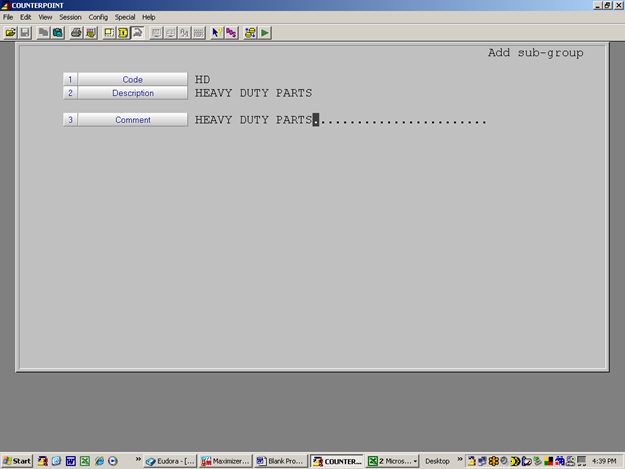
Sub Groups are required to support future reporting potential, so in this case you can make the subgroups very simplistic if you choose. For example if your operation sells HD parts and well as automotive and light truck you may want to set up only two sub groups being AUT and HD as shown below.
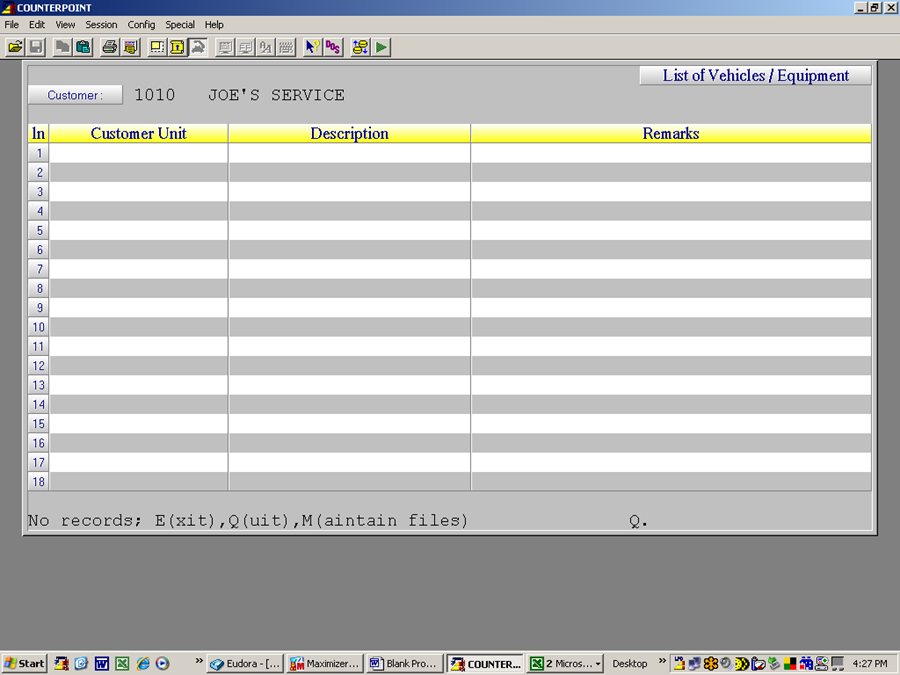
Once your groups are set up you will only need to return to this screen if you decide to change the basic groups that you set up. Upon Completion of the Groups Maintenance hit [F2] to exit this routine which will return you to the initial screen. As shown below.
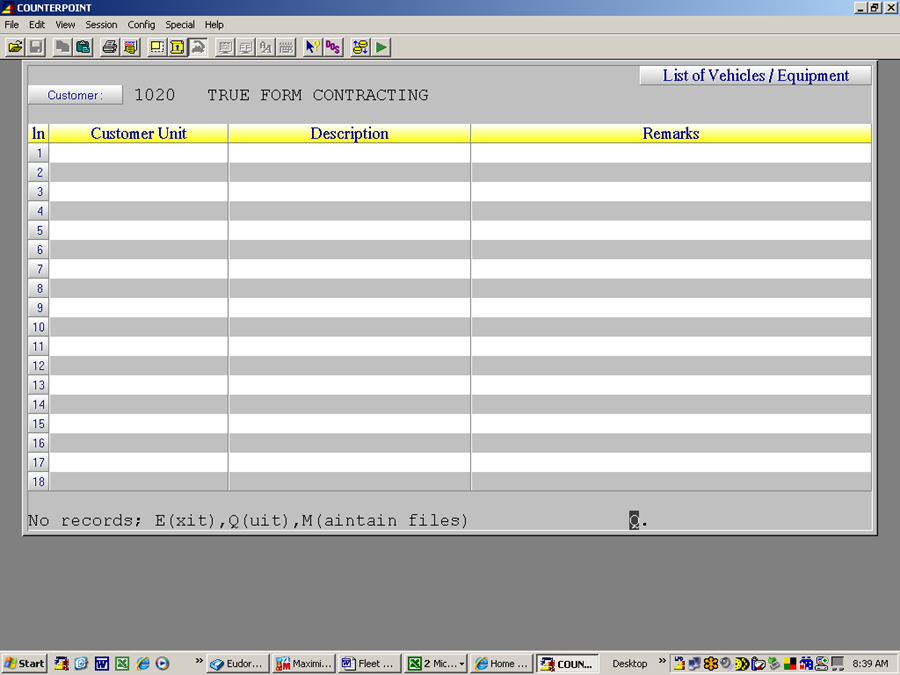
Note that the prompt at left bottom starts with “No Records” This is an indication that this customer, has not had any vehicles added to his fleet. In this case take the M(aintain Files) option then select The Equipment option which will bring up the Add/Change/Delete screen. Selecting Add brings up the following screen
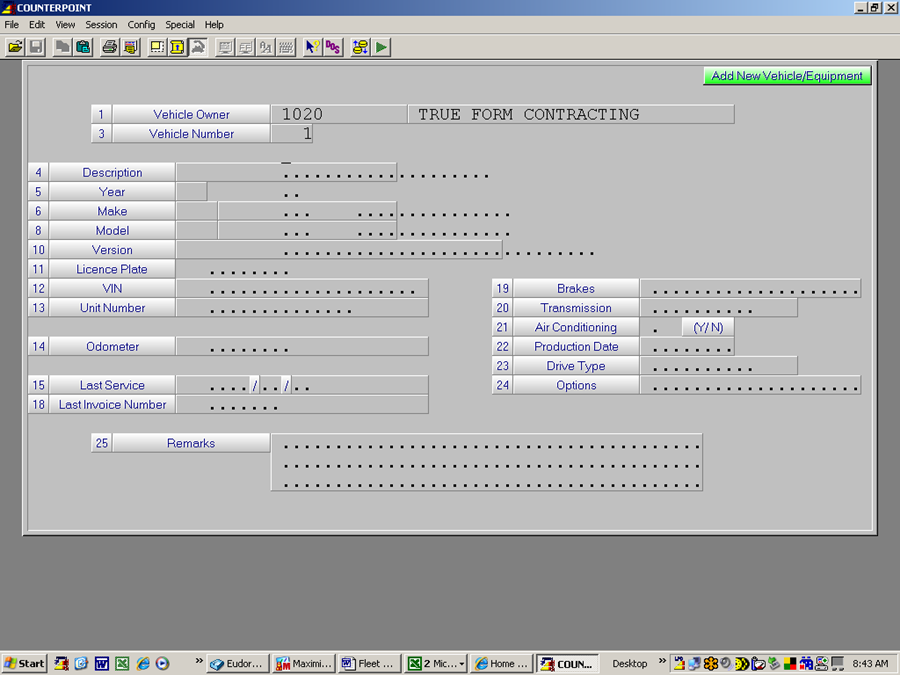
Enter Data as outlined below.
Description – Enter a meaningful description of this vehicle. Try to use the description that the customer will relate to as they will likely tell the counter staff that they are working on the “old red beast” or some other such internal name for this unit when they call in for parts.
Year – Yr of Vehicle.
Make – A three digit Alpha code for the make of the vehicle. Hit TAB to see a list of valid Car and Light Truck models. If the Unit is not automotive/light truck (ie a Heavy Duty or Construction vehicle) simply enter in the information required.
Model – A three digit Alpha code for the model of the vehicle. Hit TAB to see a list of valid options. If the Unit is not automotive/light truck (ie a Heavy Duty or Construction vehicle) simply enter in the information required.
License Plate, VIN, - Fill or leave blank as appropriate you your use
Unit Number – Typically a customer assigned number or name for this vehicle.
Odometer – Optional Enter if required. When field is accepted cursor to skip down to Remarks field.
Last Service, Last Invoice Number – These fields are system maintained from the repair shop module if it is used.
Fields 19 thru 14 - Reserved for Future use. No entry is required or possible in this screen.
When all fields are complete and you are happy with the results hit [F1] to add this vehicle to the customers fleet. If there are no other units to be added to this fleet, hit [F2] to exit the program. This will return you to the Fleet Vehicle list page.
Select M(aintain) and then select PartsList enter Add/Change/Delete as appropriate which will bring up the screen as shown on the following page.
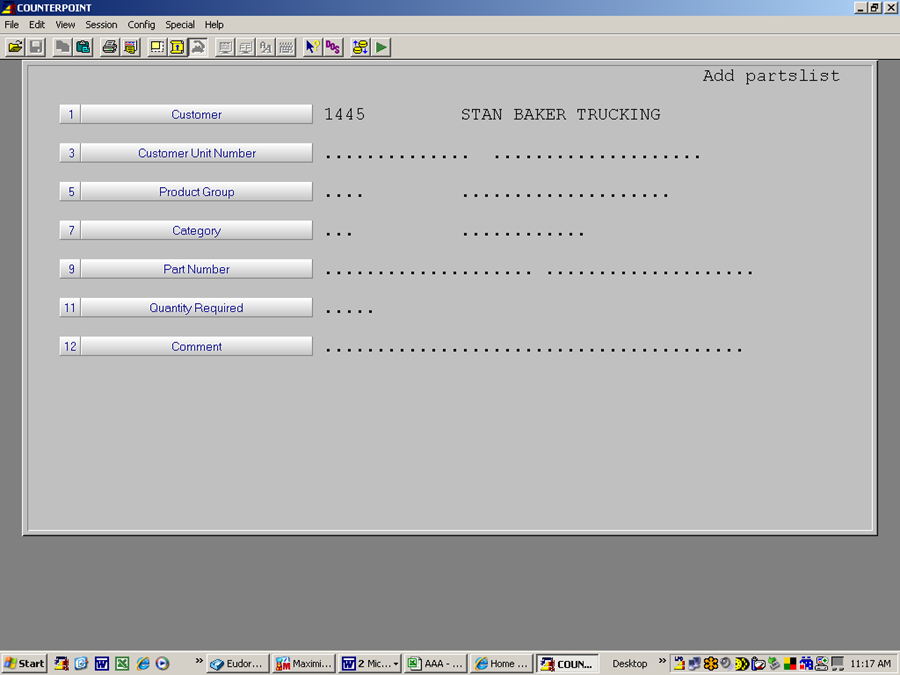
Enter Data as follows
Customer – Entered by the system.
Customer Unit Number – Enter the unit number or name that the part(s) you are about to enter will be used on.
Product Group – Enter the Product Group that the entered parts will have sales data captured under. (ie HD or AUT in this example)
Category – Cursor will skip this field and auto fill when you enter a part number. In the case where the part exists in more than one category you will need to select the correct category from the displayed options.
Part Number – Part number used on the specified vehicle.
Quantity Required – Enter the quantity required in this units use of the part.
Comment – Optional Enter a free form comment that will assist in ensuring this part is correctly chosen when the request comes in (ie “Used on the PTO for the hydraulic pump”) or something similar.
When you are happy with the screen hit [F1] to accept the entry.
Repeat for all other parts used on this Unit. When done hit [F2]
This completes the set up of a Unit and it associated parts.
Using The Fleet Part System Within COUNTERPOINT
When a customer calls in for parts and identifies that these are for a unit in his fleet proceed as follows.
- Set up the invoice for the customer as normal (ie enter customer number PO if required and your customer number.
- When the cursor is in the Line Type field hit Shift/[F10] which will bring up the customer fleet list similar to that shown below.
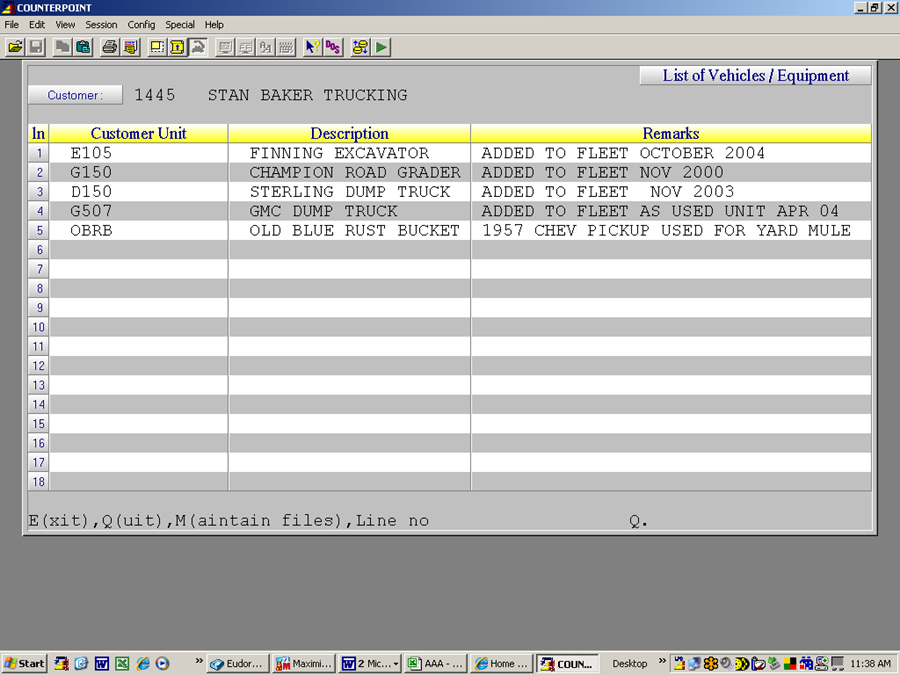
- Select the appropriate unit as specified by the customer which will bring up the parts list. As shown below.
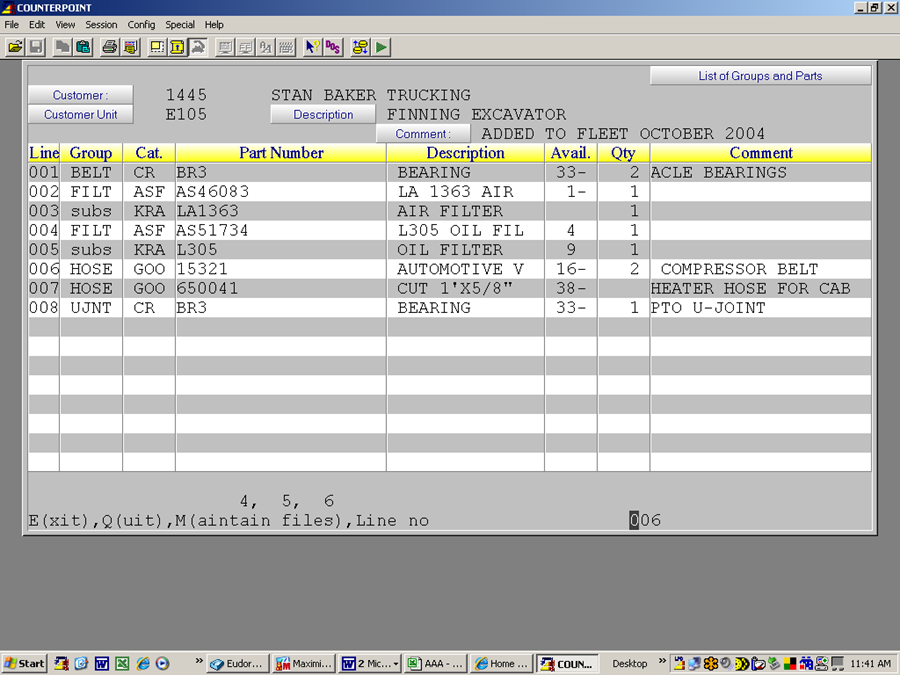
- Enter line number(s) corresponding to the parts you need to sell. Note that as you select line numbers the program moves selected lines to the space just above the “Maintain files” line.
- When you have selected all required parts hit “E” to exit the screen and move the parts in the quantities specified at the customers prices onto the invoice.
Notice that the parts list displays the quantity on hand and the quantity required for each part.
If you need to add, delete or change a part for this unit it can be done at this point by entering M to launch the maintain files routine.