Setting Up Polycom Conference Phone
Overview
Polycom phones do not, by default, automatically provision with your AMS provided PBXact system. Due to the limited functionality of the phones, it is suggested to manually set the device up. You can do this by going through the following steps:
Get the IP address of the device
Once the phone is plugged in, it should obtain an IP address. In order to register the unit, we will need to know the IP address. To find out the IP address, from the phone:

- Select Network =>

- select TCP/IP Parameters¿ =>

- The current IP Address is being displayed

Log on to the unit
Once you have the IP of the unit, you will need to open a browser and browse to the unit via the IP address
The default admin username is Polycom, the default password is 456

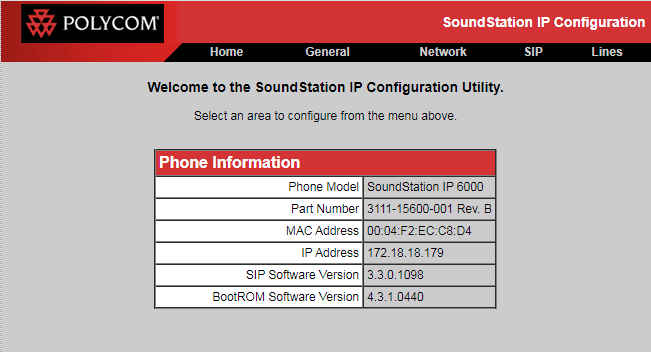
Once you have logged on to the device, you will be presented with the main menu screen
Registering the device on the PBX
AMS will need to provide you with the proper URL and user credentials to complete these steps.
Register the SIP server
- To access the SIP server settings for the device, click the SIP heading
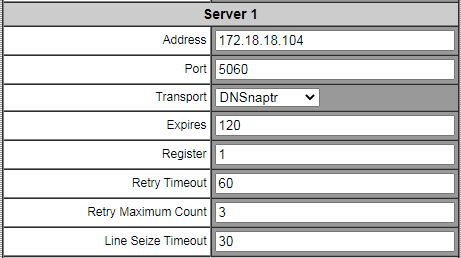
- Next, you can scroll to the Server 1 section

- The fields in Server 1 can be filled in as follows:
- Address: The PBX address as provided by AMS
- Port: The server SIP port as provided by ams
- Transport: DNSnaptr
- Expires: 120
- Register: 1
- Retry Timeout: 60
- Retry Maximum Count: 3
- Line Seize Timeout: 30
- The rest of the fields can be left at their default values
- Click the submit button at the bottom of the page


Registering the Extension
- To access the SIP extension settings for the device, click the Lines heading
- The Line 1 settings will be where you enter in the server IP, port and user settings
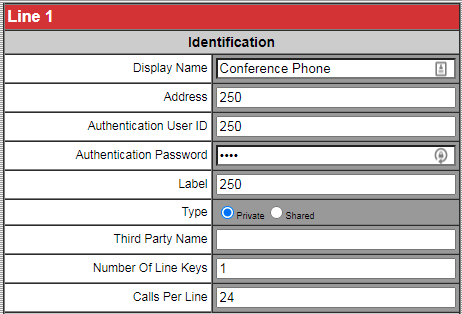
- The fields in Line 1 can be filled in as follows:
- Display Name: Any name to identify the unit
- Address: The extension number as provided by AMS
- Authentication User ID: The username as provided by AMS
- Authentication Password: The Password as provided by AMS
- Label: The extension number as provided by AMS
- Type: Private
- Third Party Name: blank
- Number Of Line Keys: 1
- Calls Per Line: 24

- Next, you can scroll to the Server 1 section
- The fields in Server 1 can be filled in as follows:
- Address: The PBX address as provided by AMS
- Port: The server SIP port as provided by ams
- Transport: DNSnaptr
- Expires: 120
- Register: 1
- Retry Timeout: 60
- Retry Maximum Count: 3
- Line Seize Timeout: 30
- The rest of the fields on this page can be left at their default values
- Scroll to the bottom of the page and click the Submit button


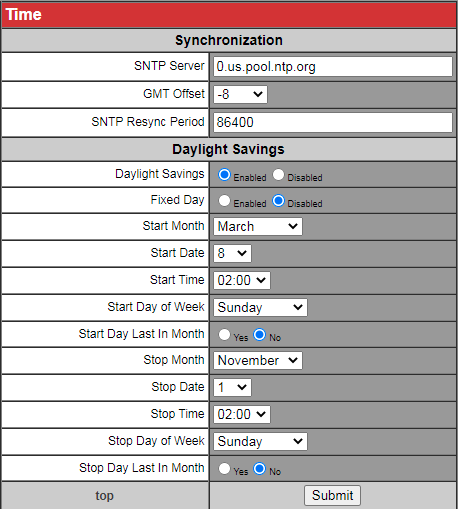
Setting the proper time
- Click the General heading
- Click the Time heading
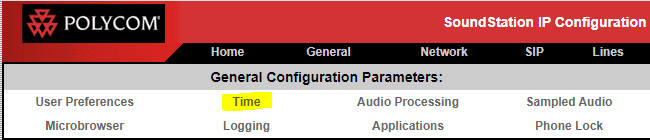
- Adjust the time settings accordingly

- Fields that need to be set are:
- SNTP server: Set to the time server provided by AMS
- GMT Offset: Set to your appropriate timezone offset.
- All other fields can be left at their default values
- CLick the Submit button at the bottom of the page.