Setting Up A Device
Overview
This document outlines the setup of new phones for use with the jDispatch module.
Setting Up Drivers
StepThe 1. first Setthing that is required is to set up drivers in COUNTERPOINT
Activiating theirYour first name.
Step 2. Set up device. (If this is not a new android phone, you canwill skipalso need to Stepcomplete 3)
Email: _________________________
Password: ______________________
Step 3.
Install jDispatch.
JDispatch
- Click on the android play store icon
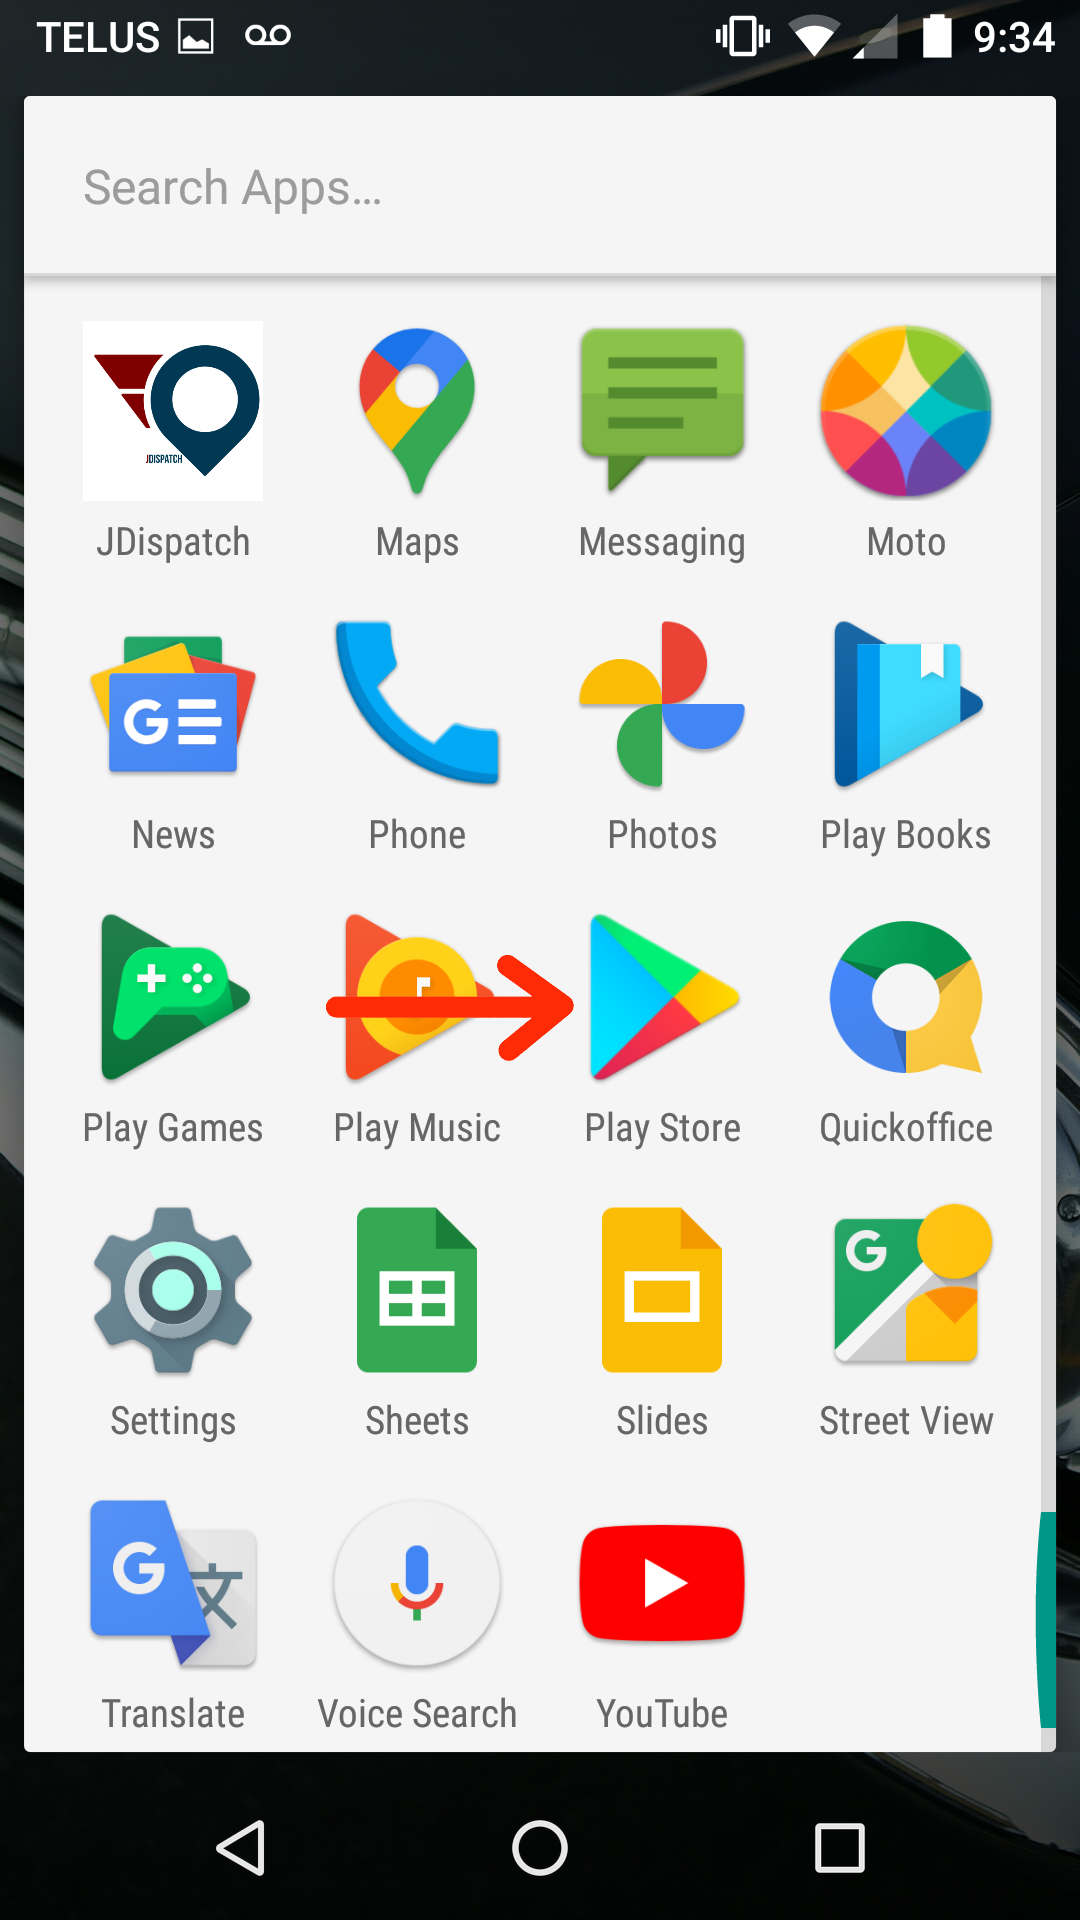
- In the top search bar, type in jdispatch. You may get back a number of results. Please make sure that you install jdispatch from AMS

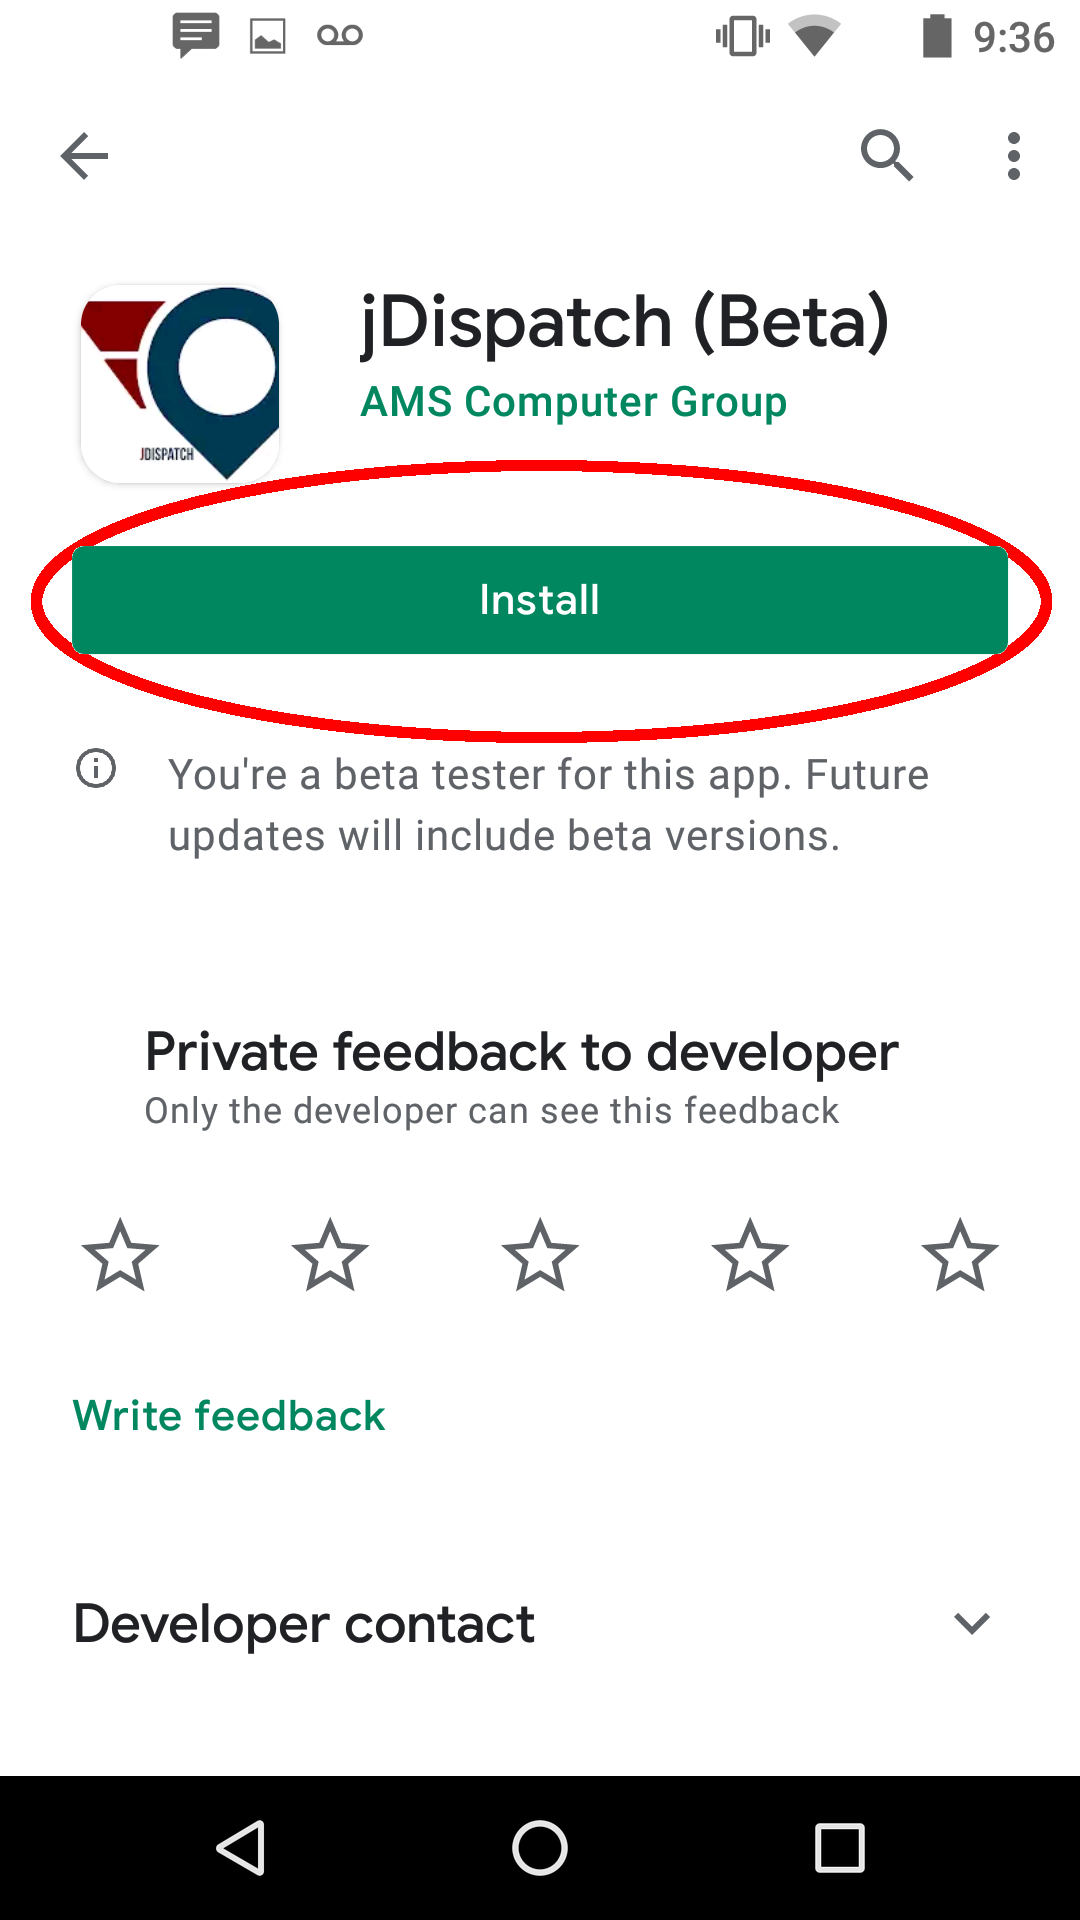
- Tap the listing, and tap the install button.
AcceptIftheasked, accept permissions.

- Once the app is installed, tap the options button in the top right. Ensure that auto-update is checked.
Tap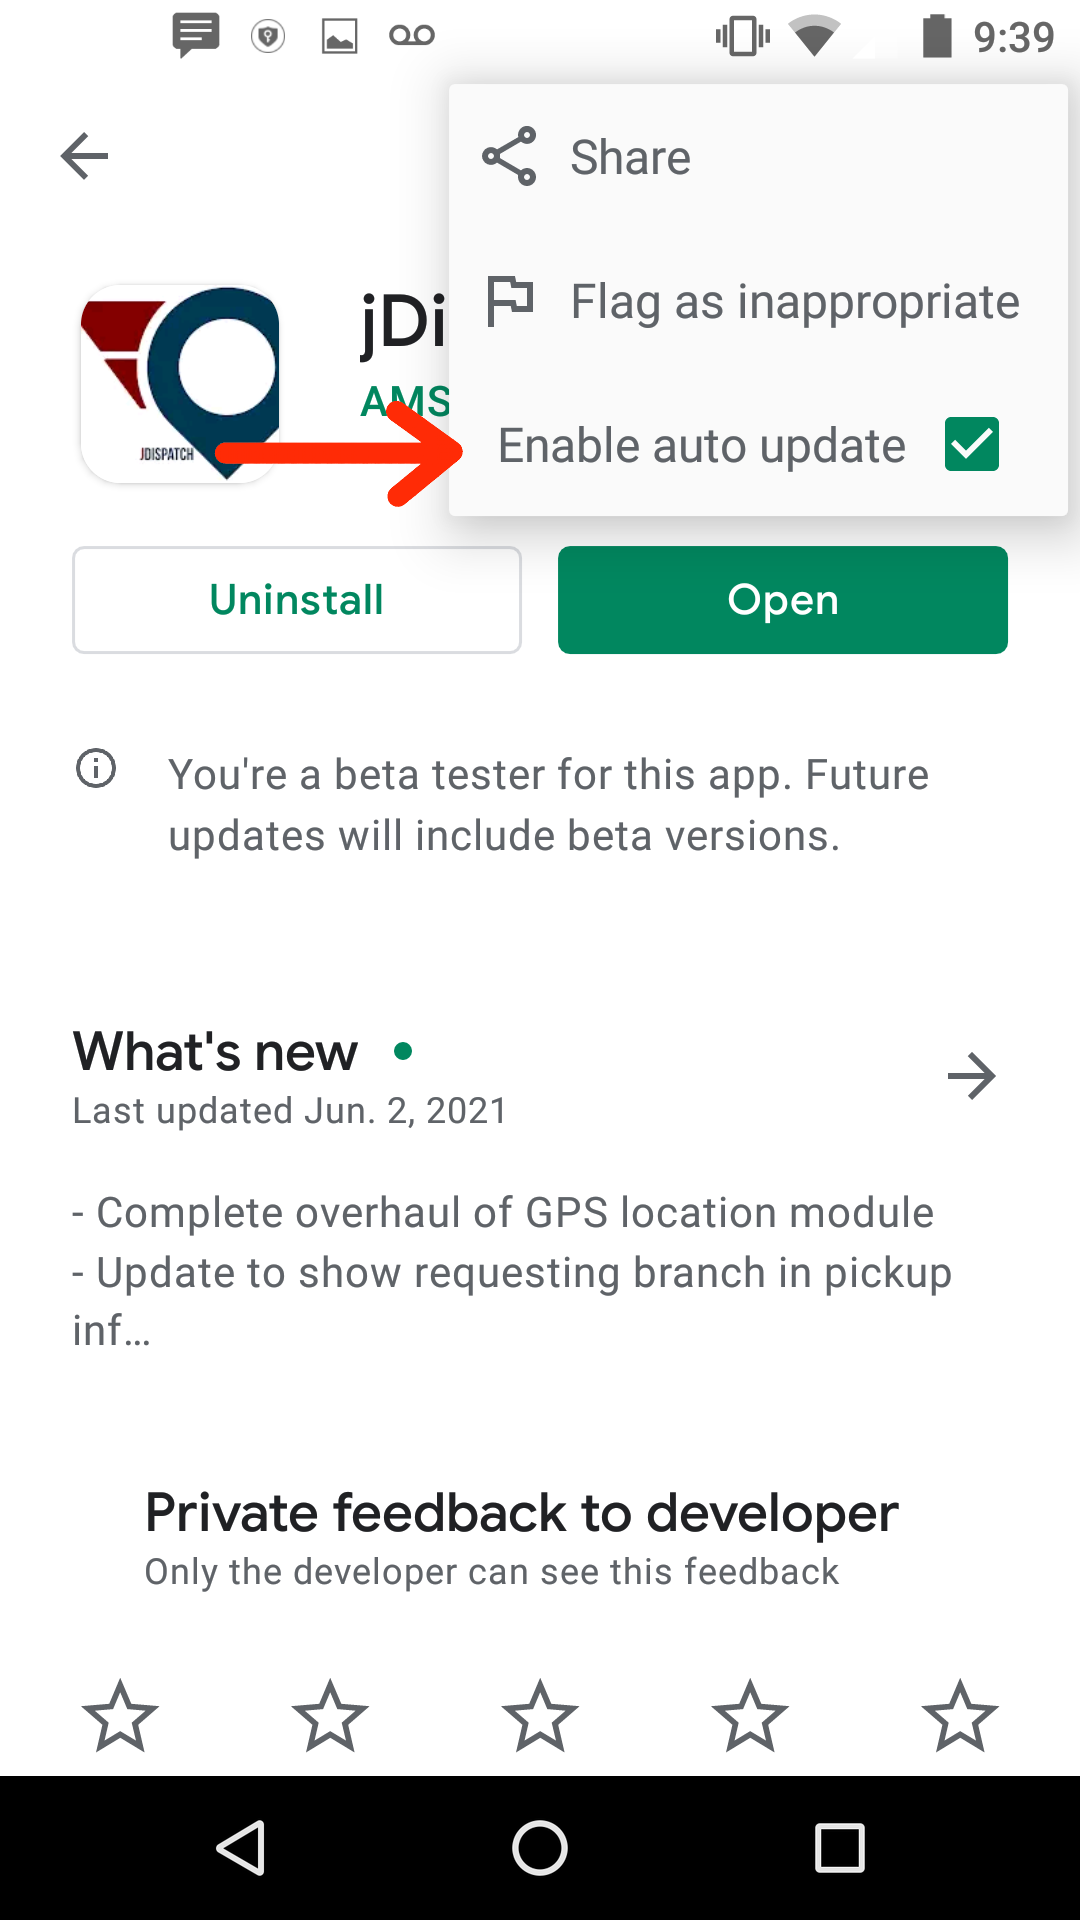
theOpenYou should be presented with a warning message Complete step 3 before continuing.


Sign
StepTo 4. JDispatch Log Into the jDispatch dashboard.
- Open an internet browser and go to the following URL:
https://www.jdispatch.caca/dashboard.php
- Log in with the your jdispatch admin credentials
Login: _______________________
Password: ____________________
- Click the Register Phones button on the left menu bar.

Open JDispatch and Allow Location Permissions
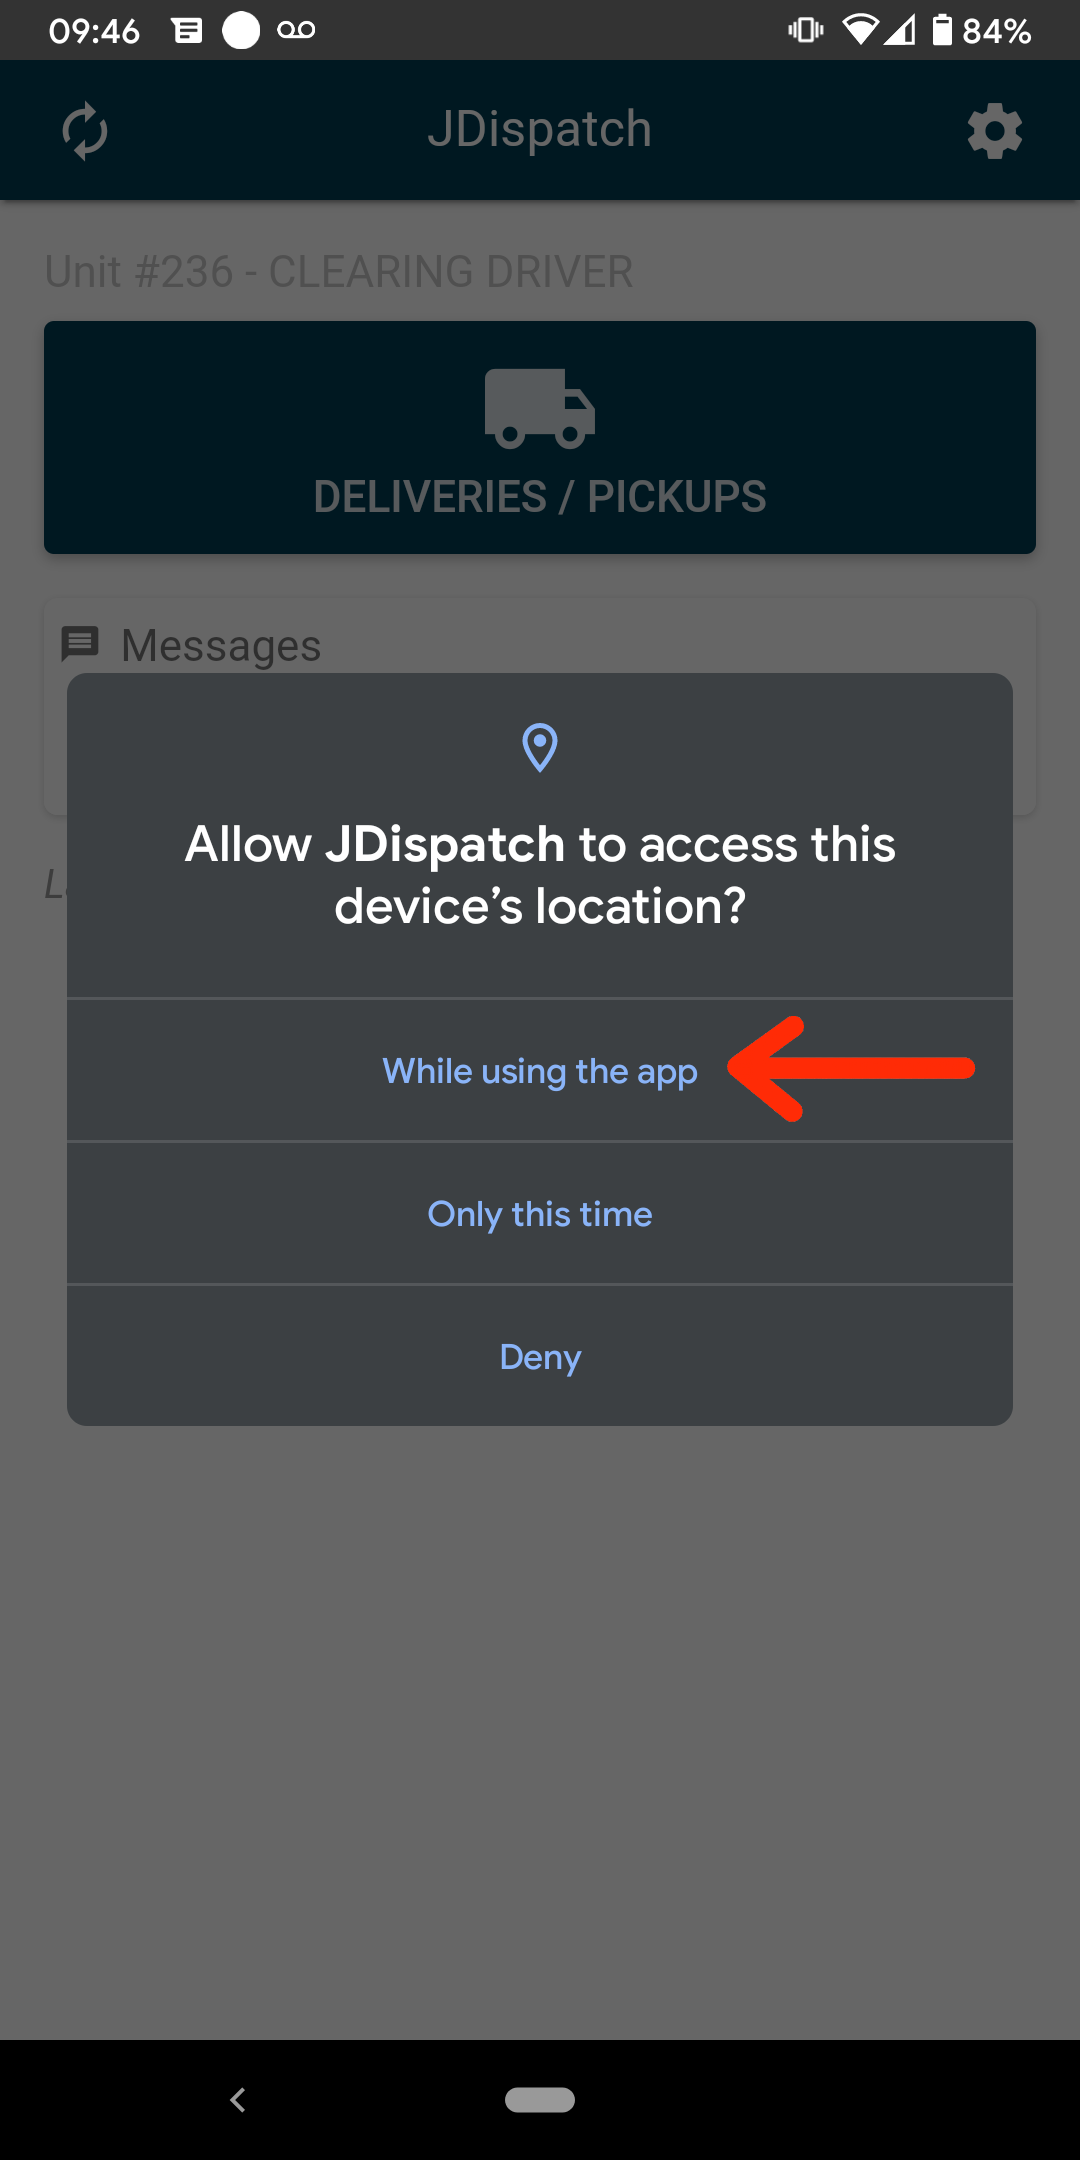
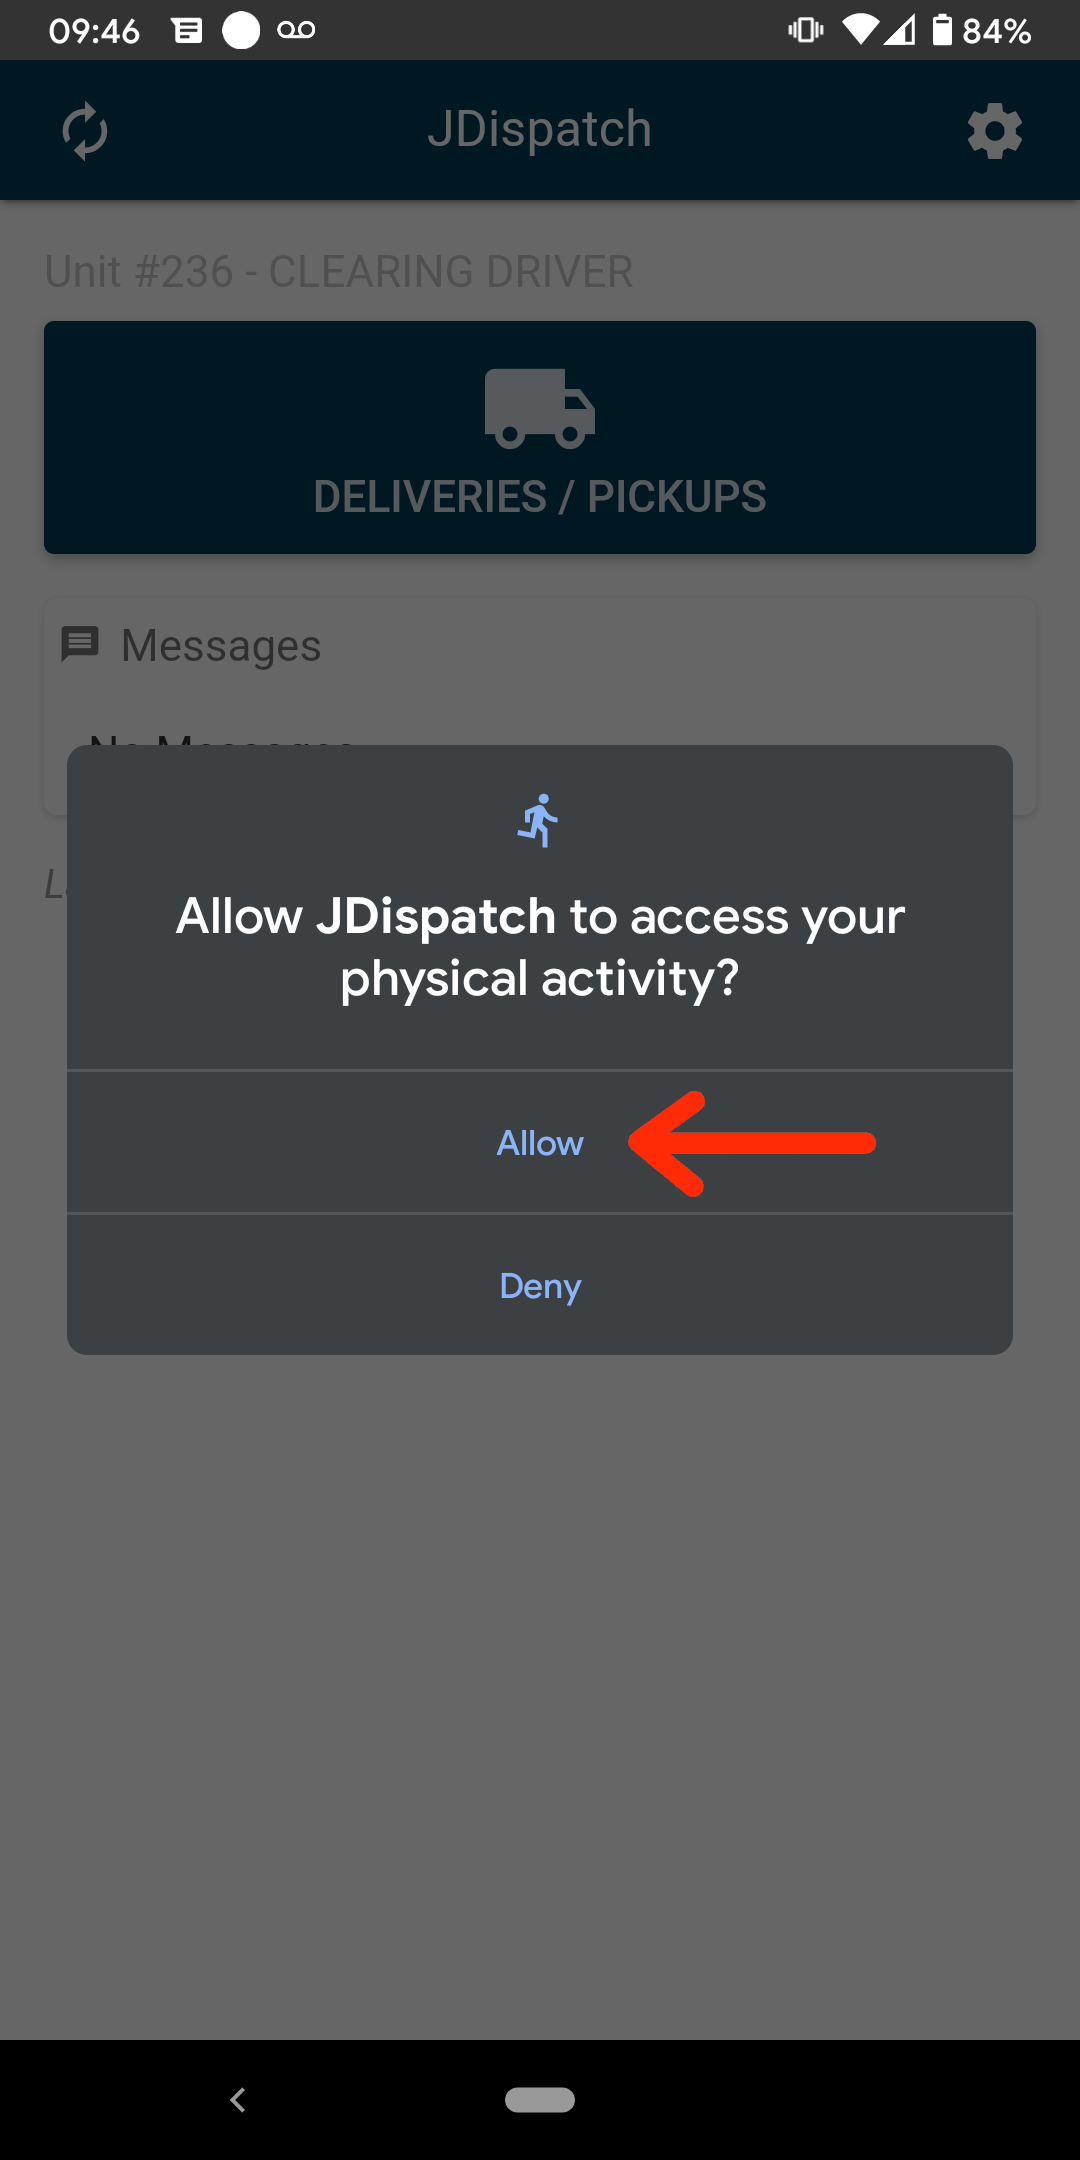
StepWhen 5.you first Register your phone withopen the jDispatchapp, service.it should ask a number of questions about permissions. These permissions must be allowed in order for JDispatch to properly report driver and delivery location
If you deny any of these permissions, the driver's location may not be reported to the JDispatch server and the driver location map may not work correctly or at all.
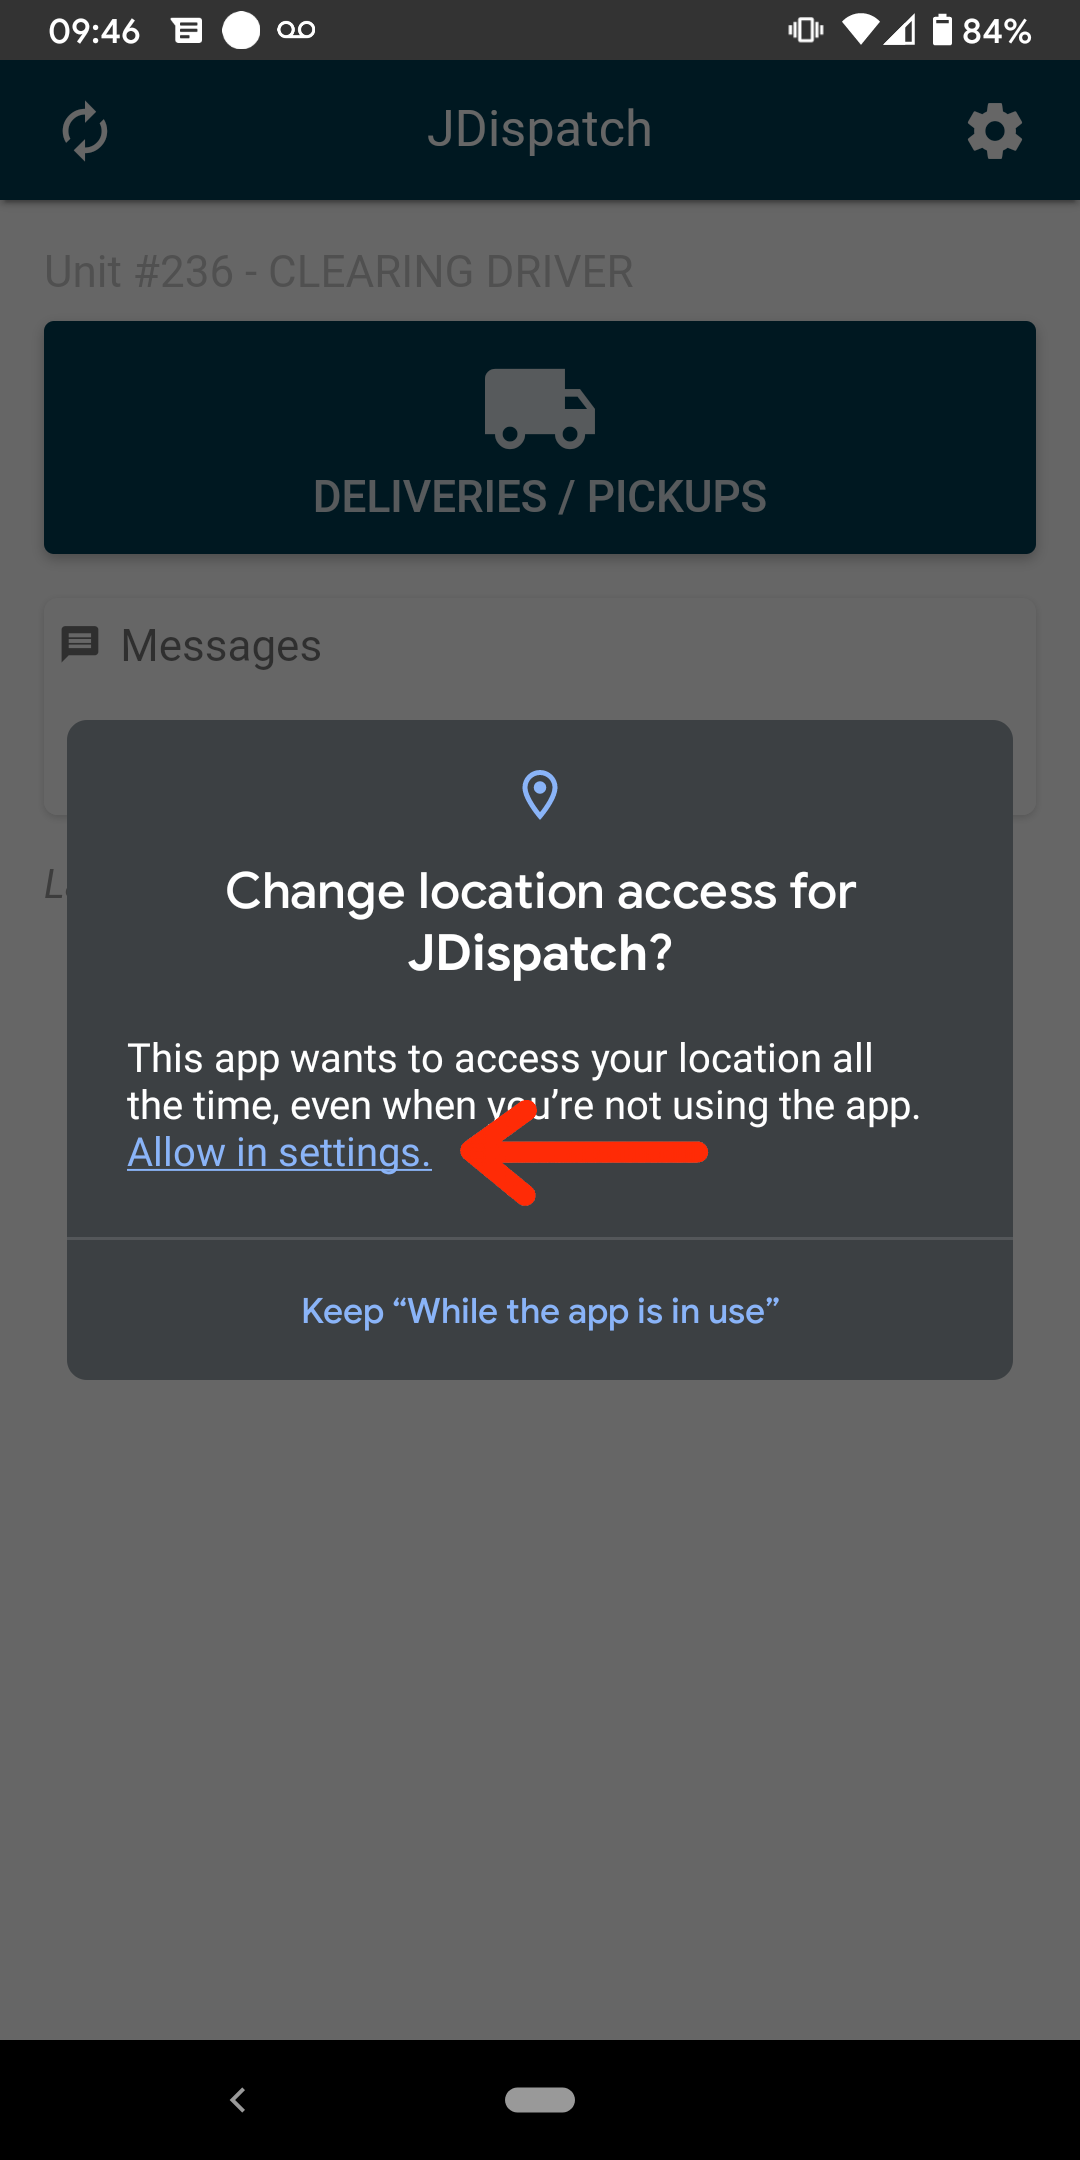
JDispatch requires location services to always be active, so you may receive a number of messages about allowing permissions
OpenAllowing JDispatch to access this device's location? This allows JDispatch to report thejDispatchdeviceapp.locationYousoshouldthat it can be reported in the JDispatch dashboard under the 'Driver Location' section

Change location access for JDispatch? This will take you to a screen where you can allow JDispatch to report the device location all the time

Register The Device
Once you have allowed all driver permissions, youshould have a message warning you that the phone is not registered.
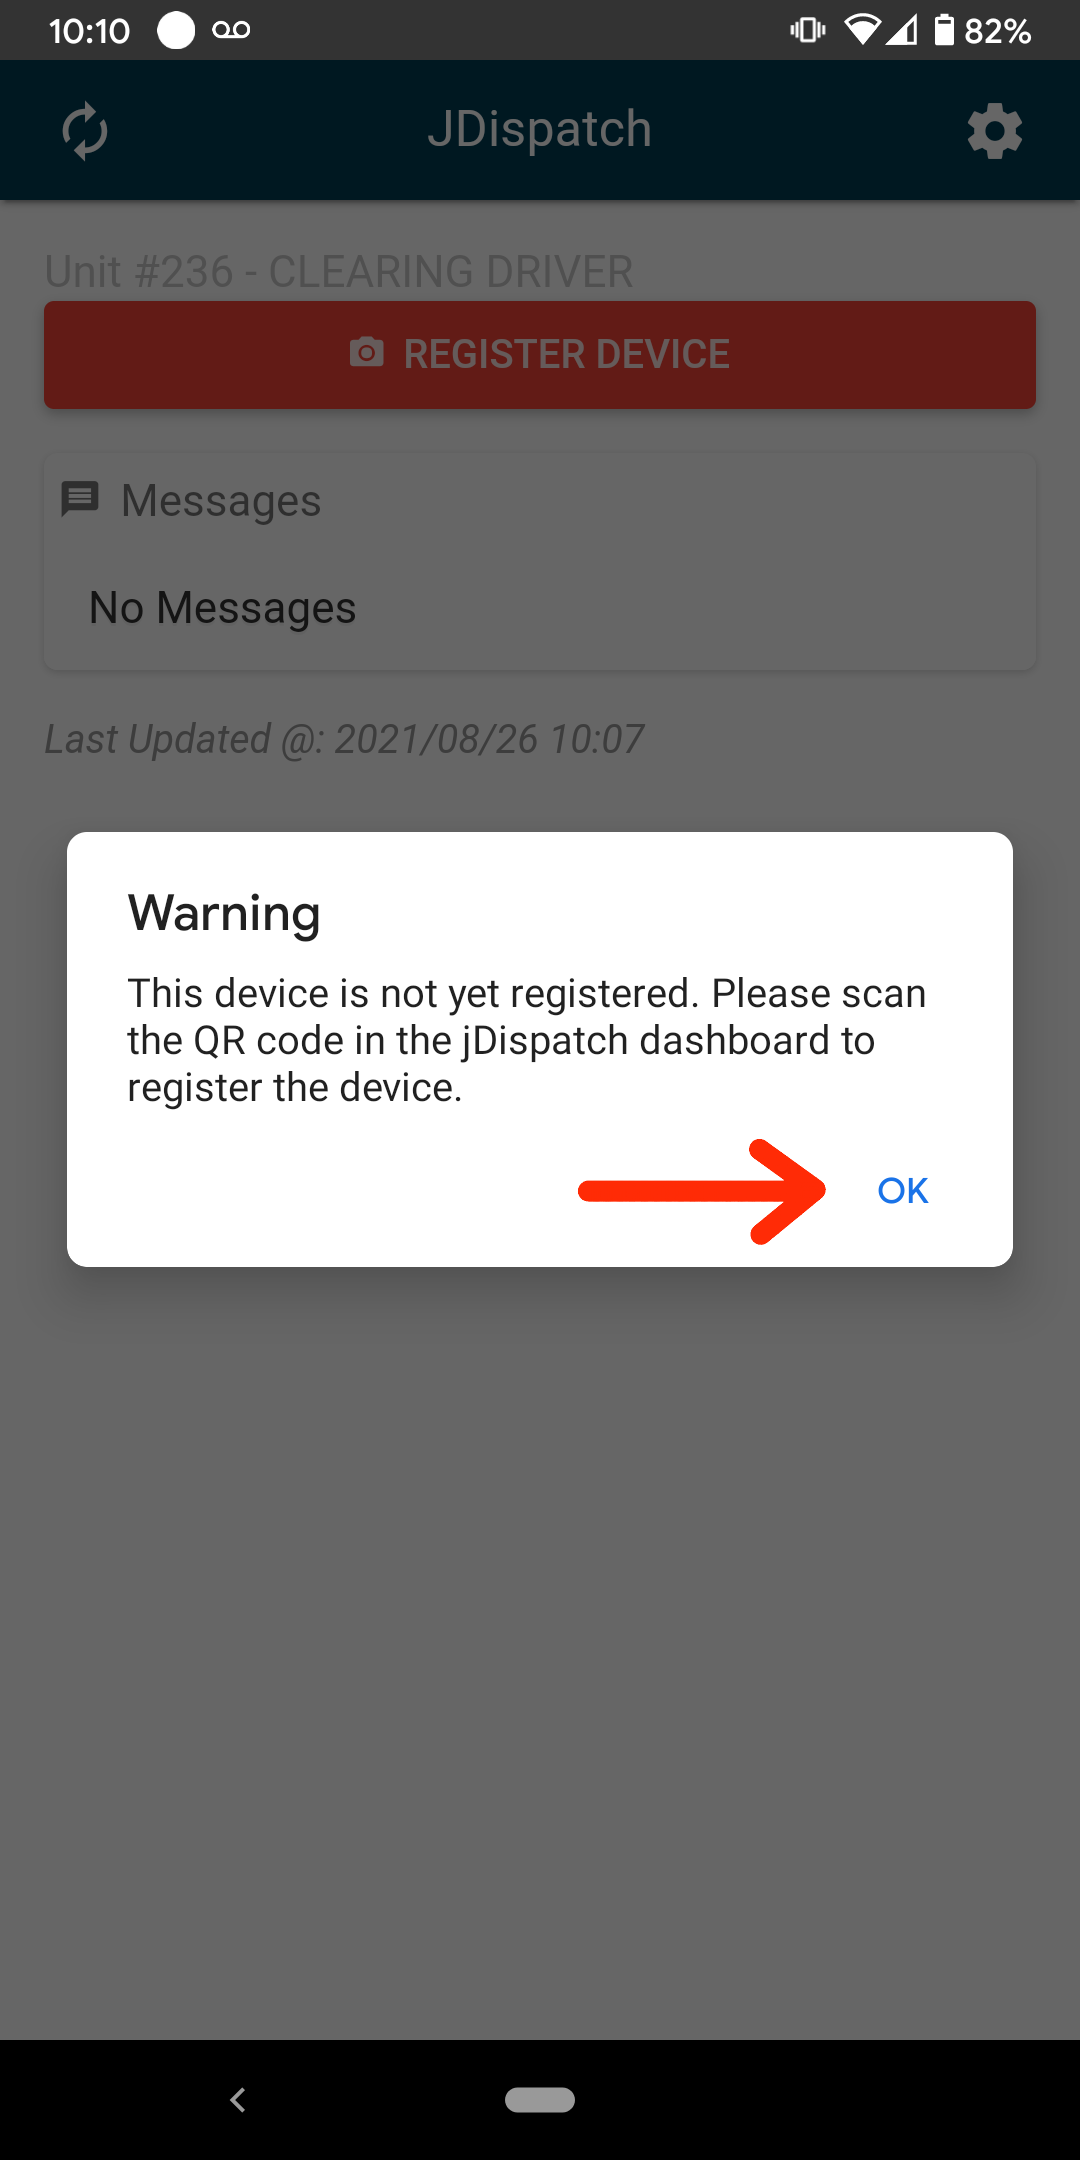
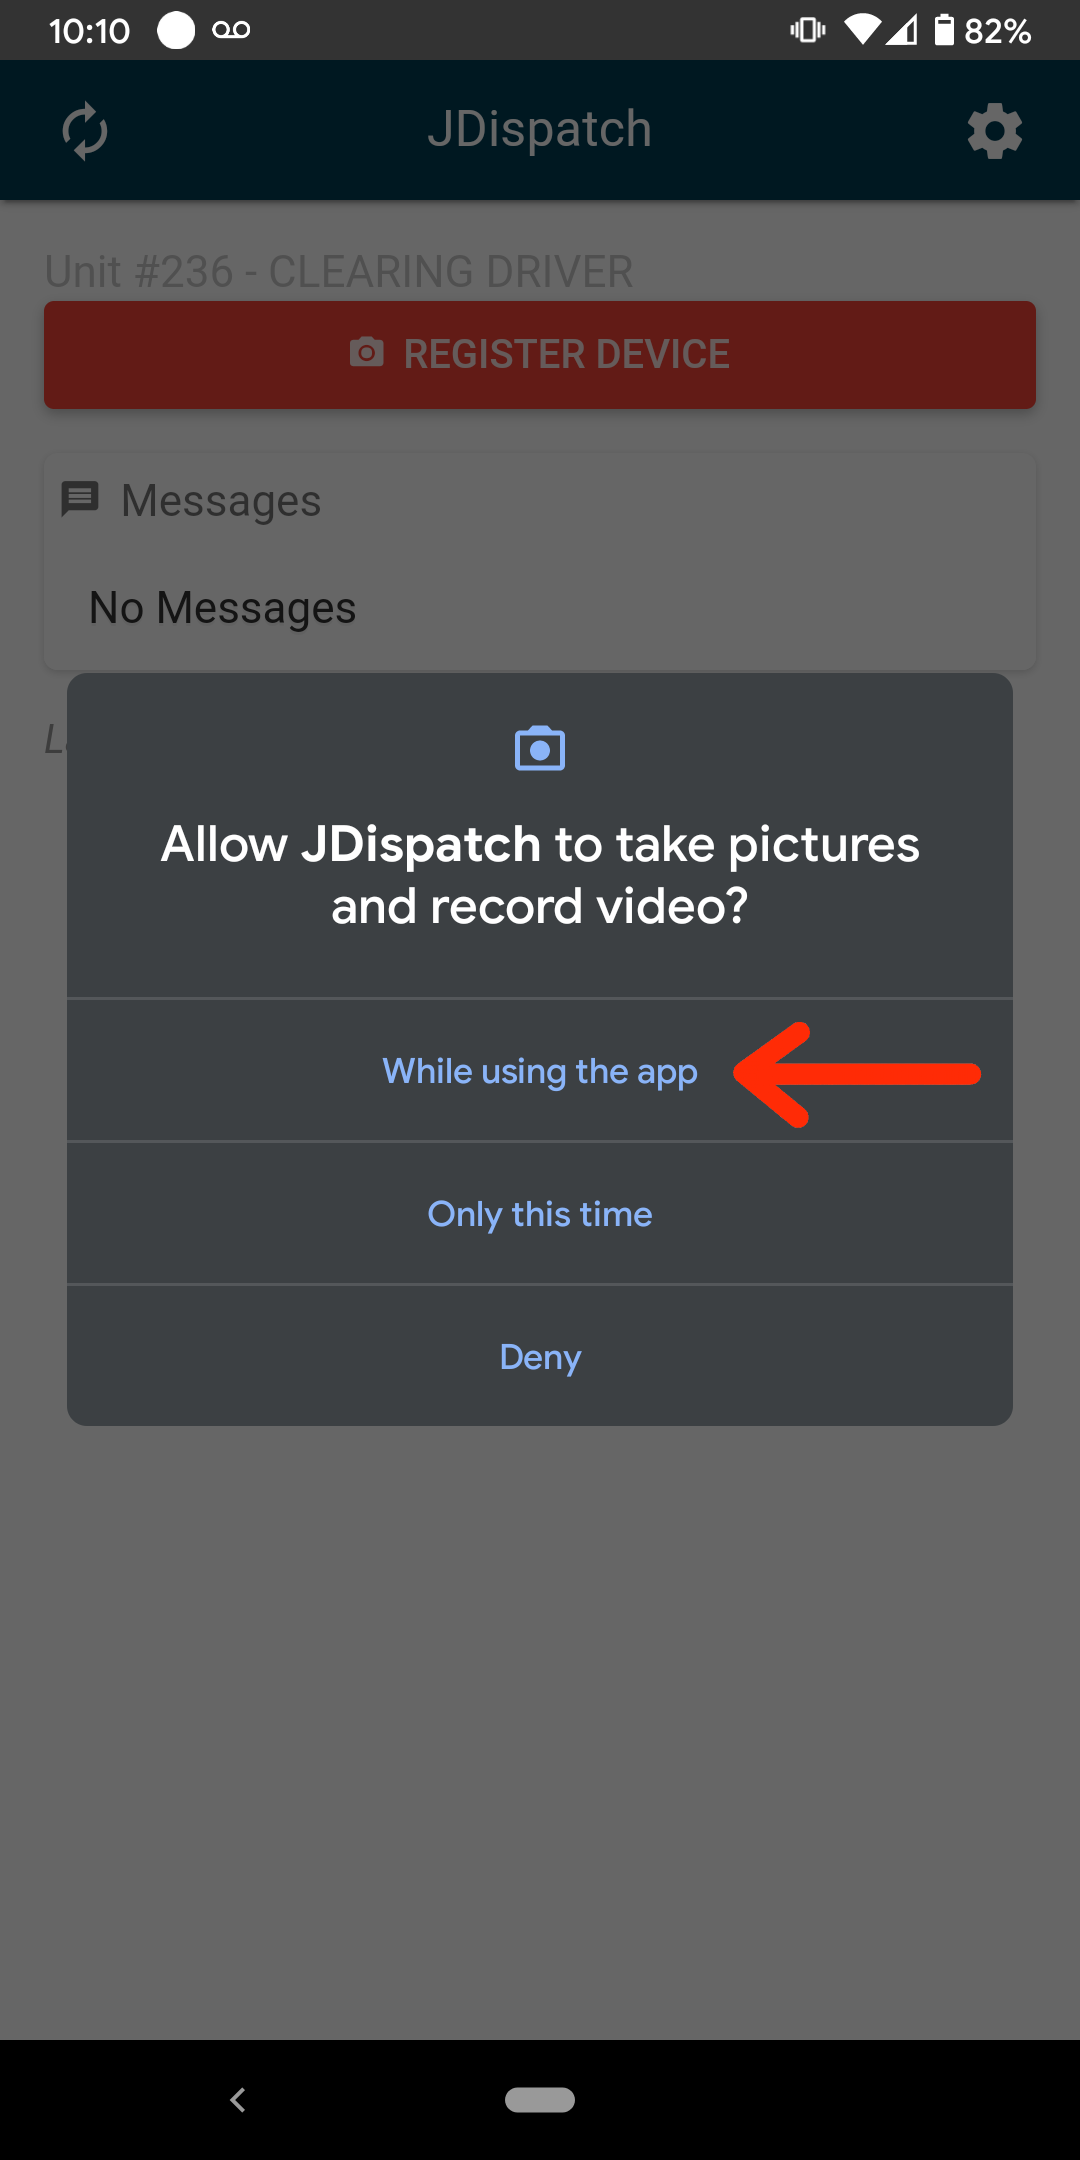
You should now see a red Register Device button. Tap this button. The first time you do this, the app may ask for additional permissions. You should allow JDispatch to take pictures while using the app.
Tap the Register Device Your camera should initialize. With the camera initialized, focus on the QR code on the screen you opened up
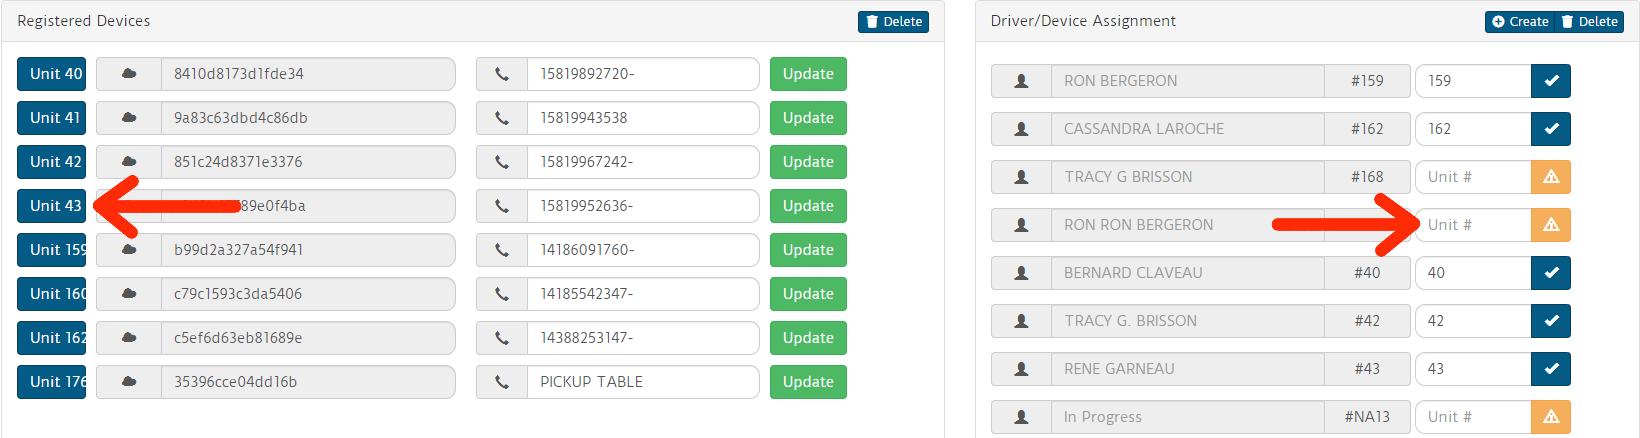
Step 6.
Assign a Driver to theThe phone.
Phone
- In the jDispatch dashboard that was opened up
in step 3,previously, you should see a listing of all your drivers that you have set up inSmartTermin your ERP under Driver/Device Assignment. - Click on the blue Unit button for the newly set up device and drag it over to the driver who will be using this device. Next to the driver’s name, a checkbox icon should appear. This means the assignment was successful.