Adding and Maintaining Users
Registering a new user
Sending invite email
In order to registerRegistering a new user to Counterpoint Cloud Platform, there are two key pieces of information your employee will need, in addition to his own login credentials and email:
Your employee's Salesrep ID is accessible to youdone via Counterpoint,an andinvite allowsbased method which can be initiated by any Counterpoint Cloud Platform admin user within your company.
Sending the invite can be done by going to associatethe allCP2 Manager tab in the left-bar navigation pane
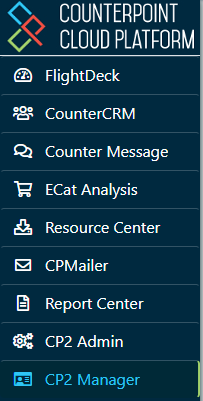
Fromt he CP2Manager menu, click the Add User button at the top

This will present you with a basic user information form:
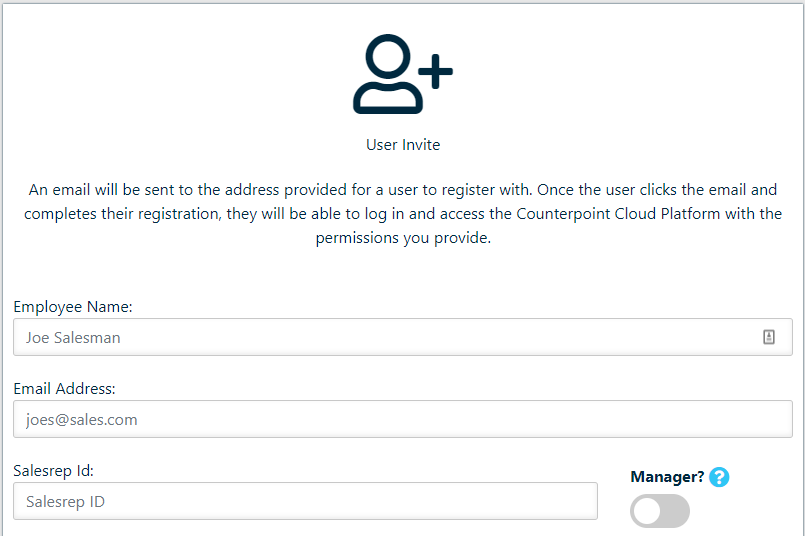
Information on this form is gathered in order to set up just the most basic user information and send out an invite for the user to configure their username and password
Employee Name: The Employee's name as it will appear on reports, etc.
Email Address: The email address which to send the registration invite to.
Salesrep Id: The sales rep ID that this person uses. This should match the sales rep id that is assigned to a customer.
When this is filled in, the user will only see customer listings and sales figures for their assigned customers
Manager: Marking a user as a manager allows them to see sales data for customers of theirother sales withreps
Branch: You will also be given a listing of valid branches. You should assign the user's primary branch here.
Receiving the invite email
The user should then receive an invite email from the notifications@counterpoint.cloud email. This email will contain a link within it that, when clicked on, will direct the user to their newown registration page.
If the user does not see a registration email in their inbox, have them check their SPAM filter
Completing the user registration
When the user clicks on their email, they will be directed to a sign-up form

The user will enter in their desired username and a valid password.
Counterpoint Cloud Platform account.does Typicallyrequire complex passwords and will notify you if the chosen password does not meet the minimum requirements of the service.
Upon successful completion of the user setup, your user will be presented a Salesreplink IDto log in.
Managing users
Once a user is set up in the platform, you can manage the user by going to the CP2 Manager tab in the left-bar navigation pane. Once in the CP2 Manager pane, you can select to edit the user you wish to manage. The user management screen has 4 characterspossible long,panes to manage different of the user
User Profile
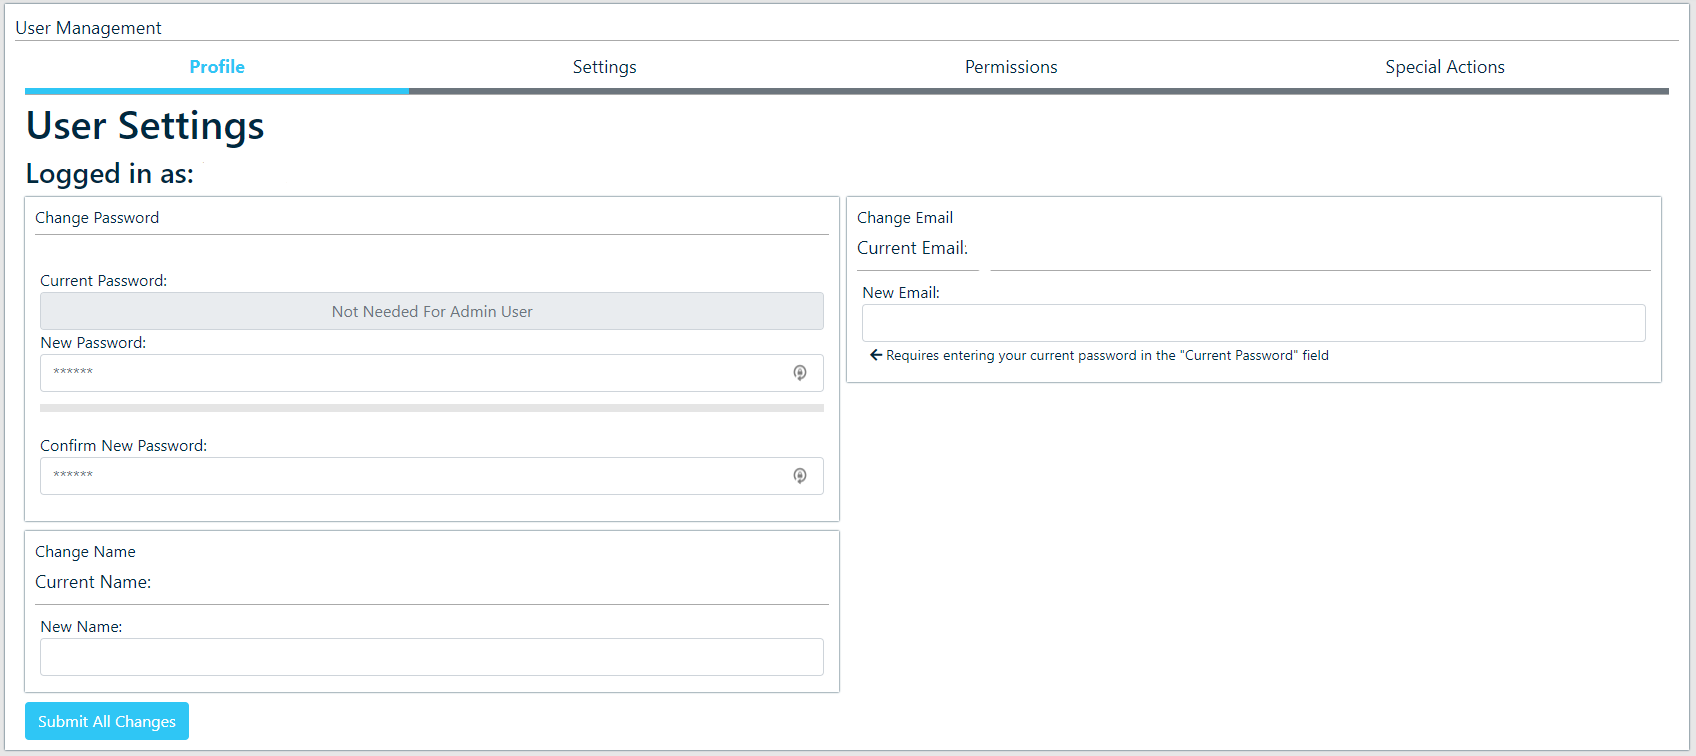
The Profile tab allows you to change the following
As an admin user, you are not required to enter in a user's current password in order to make this change
Name: Change a user's name as it appears on reports, etc.Email: Change the email associated with a user's account
User Settings
The user settings tab manages server settings and looksdefault likevalues "0026"used butby somethe installationssystem. mayThese havechanges shortershould ornot longerbe IDs.made without first reviewing the possible options with AMS to avoid causing problems with the user's account.
Your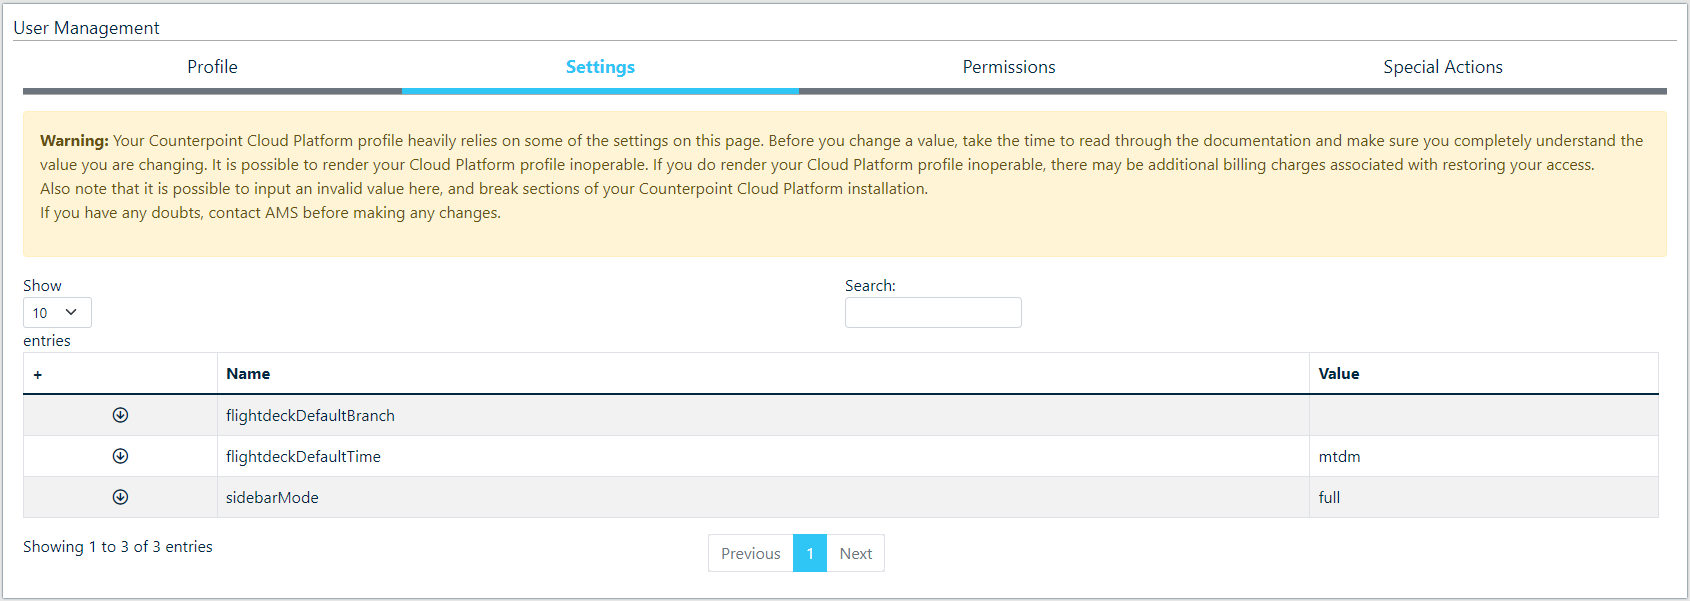
The Keyuser wassettings providedtab allows you to youmanage 3 server values
User Permissions
A user's access to store branches and the various modules available within the Counterpoint Cloud Platform andare isall whatmanaged tieswithin this tab
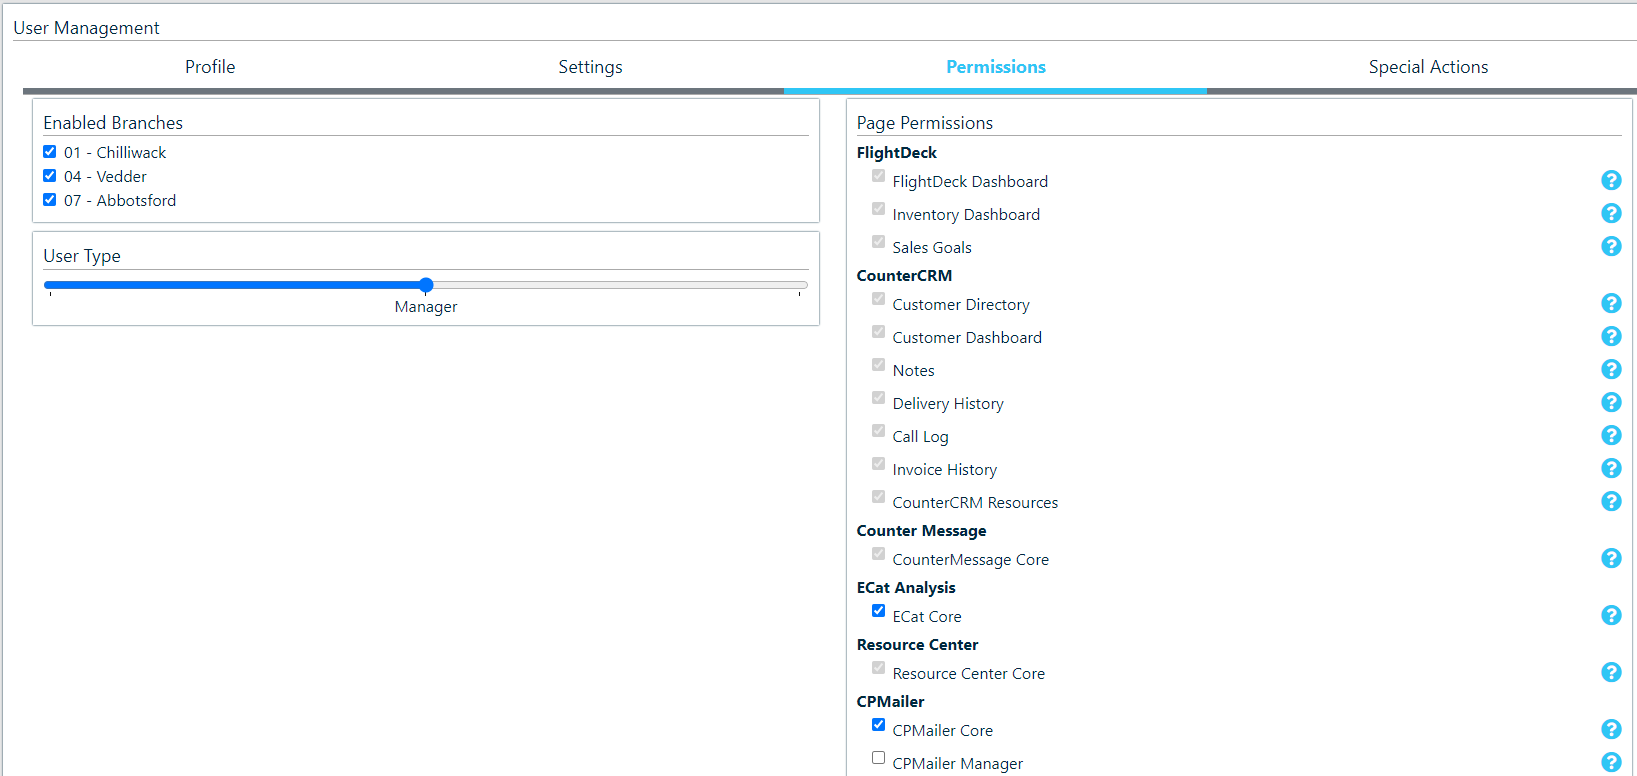
From the Sign In page, select the "Create Account" option under the Sign In button. This switches to the registration form, and allows you to fillelevate outor the information needed forlower a newuser's account.
Onceaccess level
If there are any issues with the registration process, you'll be shown a red box with oneaccess or morerevoke error messages inside. The values you submit must match the following constraints:
Username - Must be 7-31 characters long
Email - Must be in the form name@domain.com
Password - At least 8 characters long
Salesrep ID - Must be less than 7 characters
Once you successfully register a new account, click the "Log in" link nextaccess to "Alreadyspecific apages member ?" to return towithin the login prompt. Once logged in, you'll be asked to confirm information for your account's profile, and given the opportunity to add some extra pieces of information for Counterpoint Cloud Platform
to
Based offeron a user's global access level, some morepages personalizedare information.deemed 'required' and will not be able to be revoked.
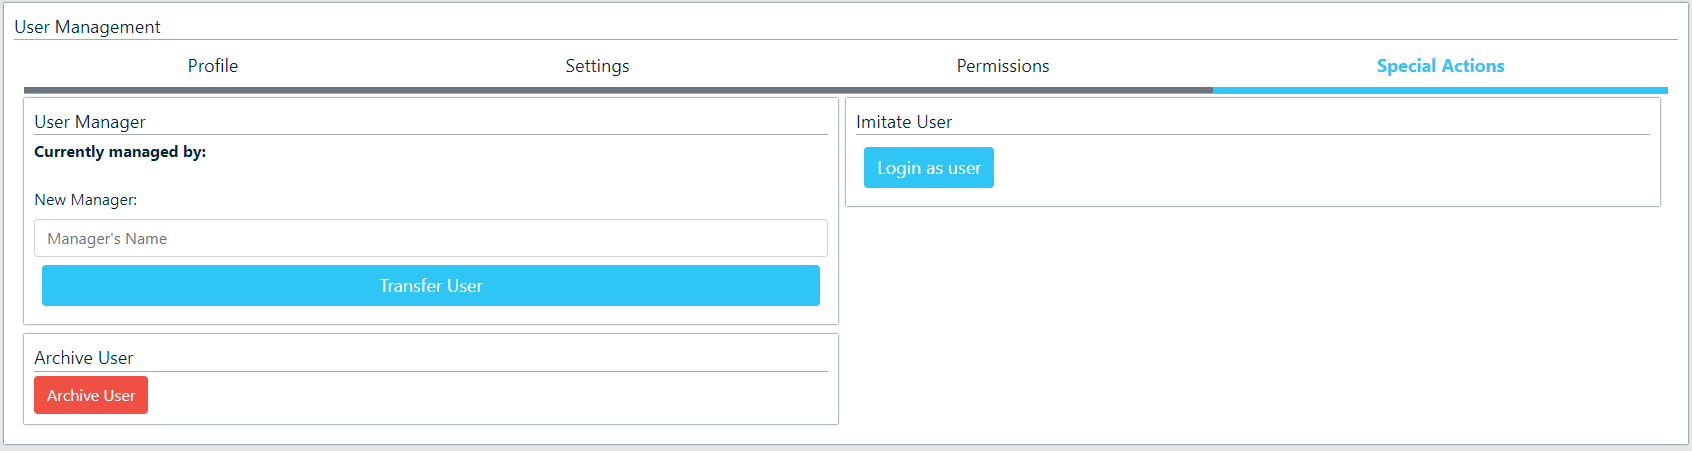
Special Actions
This tab allows for special actions to be taken on an account by an admin user
Confirm