User Control Panel
- Using the UCP
- Maintaining Dashboards
- UCP Settings
- Sending Faxes
- Find Me / Follow Me
- UCP Contacts
- Chat Module
- Device Management
Using the UCP
Overview
The PBXact User Control Panel (ucp) is a dashboard that allows you to take advantage of mor eof the system functionality via your desktop browser.
This includes things like listening to voicemail, sending faxes and even modifying the buttons on your phone (although, this may be undone with global template changes).
Each user's UCP can be tailored to fit the needs of each person. The dashboard utilizes 'widgets' to allow a user to pick and choose which functions they wish to use.
Accessing the UCP
To access the UCP, your AMS support team will need to provide you with the URL and user credentials that you will need to use.
Once you have that information, you can browse to the provided URL and use the credentials to log in
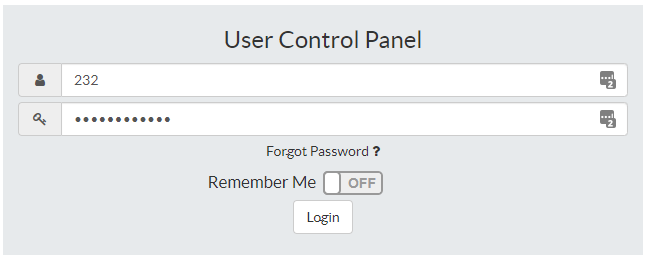
Once you first log into the UCP, you will be provided with a 'walk-thru' to help explain some of the dashboard functionality
Maintaining Dashboards
UCP 14 has been updated to include new functionality called dashboards. Dashboards are collections of widgets in different configurations.


Dashboards allow users to customize their User Control Panel experience
Adding a dashboard
To add a new dashboard look for the ![]() symbol in the upper right hand side of UCP. Click this icon
symbol in the upper right hand side of UCP. Click this icon

Now give your dashboard a name and click "Create Dashboard"

Your new dashboard will be created. If you have not previously added any dashboards you will be placed into the dashboard you just created

To add widgets to this dashboard please see UCP Widgets
Deleting a dashboard
To delete a dashboard click the (X) symbol in the dashboard tab

A confirmation prompt will ask you to confirm

If you are actively viewing the dashboard you have just deleted you will be warned appropriately

Simply Add a new dashboard to continue
Renaming a dashboard
To rename a dashboard click the (Pencil) symbol in the dashboard tab

Change the name of the dashboard and click "Edit Dashboard"

The name will be updated in UCP

Reordering a dashboard
Dashboard Tabs can also be reordered.

Simply click and drag any dashboard tab into a new position

After letting go of the mouse button the configuration order will be instantly saved

Locking a dashboard
Locking a dashboard will lock the position and size of all widgets within.
To lock a dashboard click the (lock) icon in the Dashboard tab
When a dashboard has been locked it will look like this:

To unlock said dashboard just click the lock icon again:
UCP Settings
User Settings can be found in the lower left hand corner of UCP. Look for a gear icon

Clicking this icon will bring up the user settings dialog
Account Settings
Account Settings is the first tab. The options in here relate directly to your user.
Some of these options may not be visible to you depending on your configuration

- Username: The Username of your account. You can change it here if you wish (you will be forced to logout)
- Password: The new password of your account. You can change it here but will need to reenter your password in the confirm box
- Confirm Password: The confirm password input. Used to validate you did not mistype your password
- Update Password: Click this button to update your password based on new input from Password and Confirm Password
User Details
User details is the second tab. This tab contains all of the details about the currently logged in user on the system

- Display Name: Alias/Name used in services such as Chat
- Email: Email address used for resetting the password
- First Name: The user's first name
- Last Name: The user's last name
- Title: The user's title

- Company: The user's company
- Cell Phone: The user's cell phone
- Work Phone: The user's work phone
- Home Phone: The user's home phone
- Fax: The user's fax
- Avatar: The user's avatar
- You can drag and drop an avatar here or click the "Use Gravatar" function which will use the email address provided above to lookup an avatar from the Gravatar network
Interface Settings
The last tab is the Interface Settings tab.
This tab controls how the UCP should look and feel for this user

- Language: Select the language you'd like UCP to work in. Not all languages are fully translated. To help participate in translations see Translating FreePBX

- Use Browser Language: Click this to automatically select your language based on your browser
- Use PBX Language: Click this to automatically select your language based on your PBX
- Timezone: Select the timezone you'd like UCP to work in.

- Use Browser Timezone: Click this to automatically select your timezone based on your browser
- Use PBX Timezone: Click this to automatically select your timezone based on your PBX
- Allow Desktop Notifications: Toggle desktop notifications. Various modules can take advantage of desktop notifications. This allows you to disable them globally

- Restart Tour: Restart the UCP tour when your close the user settings dialog

- Date and Time Format: Customize how Date & Time strings should look (For formatting options see: http://momentjs.com/docs/#/displaying/format/)
The default of "llll" is locale aware. Meaning the format will automatically change based on your language
Formatting is updated in real time
- Date Format: Customize how Date strings should look (For formatting options see: http://momentjs.com/docs/#/displaying/format/)
The default of "l" is locale aware. Meaning the format will automatically change based on your language
Formatting is updated in real time
- Time Format: Customize how Time strings should look (For formatting options see: http://momentjs.com/docs/#/displaying/format/)
The default of "LT" is locale aware. Meaning the format will automatically change based on your language
Formatting is updated in real time
Sending Faxes
Overview
Sending faxes from the UCP allows you to send a fax directly from your desktop. In order to do this, the image or document you wish to fax should be saved as a .pdf on your desktop
Sending a Fax
How To Send a Fax
Create one or more PDF or TIFF files on your computer. Multiple pages and/or multiple documents are acceptable and will be merged to create one fax (but not one fax document, each document uploaded with be one page or more)
To send a fax click the Send Fax button in the Fax widget:

Basic options include Destination, whether to use a Coversheet, and the Document(s). (If you enable the coversheet, additional options will appear.)

Destination
Enter the fax number of the recipient.
Coversheet
This is Off by default. Click the switch to toggle the on/off setting.
If the switch is set to On, additional fields appear:

The information you enter will appear on the cover sheet.
- Recipient Name: The name of the person you are sending the fax to.
- Message: A short message to include in the cover sheet.
- My Name: The sender's name is pulled from User Management settings, but you can override it here.
- My Telephone: The sender's phone number is pulled from the User Management settings, but you can override it here.
- My Email: The sender's e-mail address is pulled from the User Management settings, but you can override it here.
Document(s)
A single fax can contain one or more documents. There are two ways to upload documents to be included in your fax:
- Click the Upload Document button to select a file from your computer,
- OR drag and drop files from your computer to the Drag New Documents Here area.
The uploaded file(s) will appear in a list:

- To view a file, click the
 button.
To remove a file from the list, click the button.
Send
When ready to send the fax, click the Send button.

Once send has been clicked the Fax interface will send you directly to the Outgoing folder.

When a fax has been sent successfully, it will be moved to the Sent folder. If it fails to send and all retry attempts have been exhausted, it will be moved to the Failed folder.
Find Me / Follow Me
Find Me/Follow Me refers to two technologies that, in conjunction, enable incoming phone calls to be received at different locations, on different phones. “Find Me” refers to the ability to receive incoming calls at any location.


Settings Window
In this section, you can change settings for the chosen Call Forwarding Extension.
Click the Settings button in the widget title bar to continue: 

- Follow Me List: List extensions to ring, one per line. You can include an extension on a remote system, or an external number by suffixing a number with a pound (#). ex: 2448089# would dial 2448089.
- Announcement: Message to be played to the caller before dialing this group.
- Ring <Exten> First For: This is the number of seconds to ring the primary extension prior to proceeding to the follow-me list. The extension can also be included in the follow-me list. A 0 setting will bypass this.
- Ring Followme List For: Time in seconds that the phones on the follow me list will ring. The number of rings will depend on region. Example: If a phone rings for 1 second then waits 2, each ring is 3 seconds.
- Use Confirmation: Enable this if you're calling external numbers that need confirmation - eg, a mobile phone may go to voicemail which will pick up the call. Enabling this requires the remote side push 1 on their phone before the call is put through. Example "Press 1 to accept.
UCP Contacts
The Contacts widget allows you to see and create contacts that can be used in other widgets in UCP, Phone Apps and for speed dials.. The User Management Module controls which contact groups a user will be able to see in this widget.

Group Management
To add a new group called "My Contacts" click the "Add Group" link.

Name your group "My Contacts" then click "Save Changes"
The group will then appear to the left.

Add Contacts
To add a new contact to a group click the "+ Add Contact" button. You will only be able to add contacts to groups you have permissions to do so.

In the next screen you will be able to define detailed information for the new contact

There are various details to a contact:

- Display Name:
- First Name:
- Last Name:
- Title:
- Company:
Contacts can also have custom avatar images or they can use gravatar:

Additionally contacts can have multiple numbers, xmpp, emails and website addresses added to them

- Numbers:
- XMPP:
- Email:
- Website:
Delete Contacts
To delete an entire group click the "Delete Group" button

After which a confirmation box will pop up.

View Contacts
To view any contact simply click the contact's row in the table.
You will then be presented with a view similar to this if you are able to edit/delete the contact

If you only have permission to view the contact you will be presented with this view:

Chat Module
The User Control Panel (UCP) includes a built-in XMPP chat client that works in conjunction with the XMPP module. This allows users to send and receive instant messages (IMs) using a simple web browser interface.
Prerequisites
- A user must be allowed to log into UCP (set in the User Management module)
- Chat must be enabled for the user (set in the User Management module)
Enable Chat
To enable chat for a user go to the User Management module and select the Chat tab. Then select "Yes" for Enabled and save. The option to add the Chat service will now appear in UCP

Chat With a User
Chat can only be added as a Side Bar Widget. You can do this through the Add Widget interface

A list of users will appear from the left.

Click a user to bring up a chat window

From there you can type your message. Hit enter to send. You can also add emjois by pasting emojis or by clicking the emoji face in the chat window

Type your message to the recipient:

Use the return/enter key to send.

The message will be sent instantly to the receiving end
This screenshot is of Adium

When you receive a reply you will receive a browser notification if your browser is configured to accept notifications.

Collapse or Hide the Chat Window
![]() /
/ ![]() = Collapse / expand the chat window
= Collapse / expand the chat window
 = Close the chat window. To re-open, click the chat icon in the side bar and select the user in the drop-down list.
Device Management
The UCP for EPM module allows end users to customize phone buttons through the User Control Panel (UCP) web interface. Users can change button layouts and program their phone with their favorite feature codes, speed dials, Busy Lamp Field (BLF) buttons, REST Apps, and more, without the need to contact an administrator each time a change is needed.
An administrator can control which users are allowed to edit button configurations, and which phones they can edit. The administrator can allow users to edit buttons for their own phones and/or for other users' phones.
A user's changes will override the original template created by the administrator, but the original template itself is not affected. Changes are only on a per-user basis (not global). A user can easily revert back to the original template at any time. The administrator can modify the phone template in End Point Manager.
Since UCP for EPM works in conjunction with End Point Manager, the commercial End Point Manager must also be licensed, installed, and active.

Changing Phone Buttons from UCP
- Click the Settings button in the widget title bar to continue:

- The settings window will open with the current button settings. Available buttons and settings vary by phone.
In this example, we are looking at part of the page for a Sangoma S500, which has both line keys and soft keys.
- Use the drop-down menus and fields to change settings as desired. These are the same settings you will find available in End Point Manager. For each button, you can select a button type, label, value, and account (not all options are available with all types of buttons).
- After you have made the desired changes, scroll down to the bottom of the page and select one of the options in the drop down. Then click Apply.

- Save: Saves the button configuration, but does not write out configuration nor does it restart the phone.
- Save and Rebuild Config(s): Saves the button configuration and writes out configuration but does not restart the phone.
- Save, Rebuild Config(s) and Update Phones: Saves the button configuration, writes out configuration and restarts the phone. The system will send a reboot command to the phone. The new button configuration should appear on the phone after the phone restarts.
- Reset to Template:
Restoring Phone Buttons to Default from UCP
-
Click the Settings button in the widget title bar to continue:
- Scroll to the bottom of the settings and select Reset to Template then click Apply.
